Essential Guide to Replacing Screen Doors in Alexandria, VA: Tips for a Perfect Fit

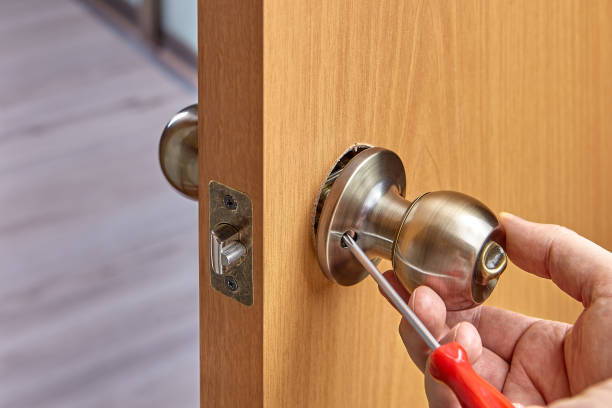
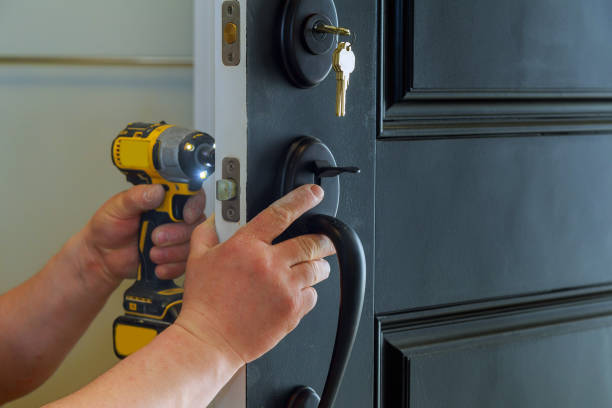
house exterior door with the inside internal parts of the lock visible of a professional locksmith installing or repairing a new deadbolt lock Closeup of a professional locksmith installing a new lock on a house exterior door with the inside internal parts of the lock door repair stock pictures, royalty-free photos & images

Replacing a screen door can enhance your home’s functionality, aesthetic appeal, and energy efficiency. Whether you’re tackling this project as a homeowner or a professional installer, understanding the key aspects of achieving a perfect fit is essential. Below are detailed tips and tricks to ensure that your screen door replacement process is smooth and effective.

Assessing the Condition of the Current Door

  • Inspect for Damage: Look for bent frames, torn screens, or misaligned hardware.
  • Check Functionality: Ensure that hinges, handles, latches, and tracks (if applicable) are in good working order.
  • Assess Aesthetic Appeal: If the door looks outdated or doesn’t complement your home’s design, consider replacing it.

This evaluation helps you determine if full replacement is necessary or if minor fixes can solve the problem.

Preparing for Screen Door Replacement

  1. Measuring tape
  2. Screwdriver (electric or manual)
  3. Utility knife
  4. Leveler
  5. Replacement screen door kit
  6. Clean the Door Frame: Dirt and debris can interfere with installation. Use a damp cloth or mild cleaning solution to wipe down the frame thoroughly.
  7. Measure Accurately: Understanding precise measurements ensures you purchase a properly fitting screen door.
Measurement Key Points Description
Width Measure across the top, middle, and bottom of the frame. Use the smallest width recorded as your guide.
Height Measure from top to bottom along both sides and in the center of the frame for accuracy.
Depth Check how thick your frame is to confirm compatibility with available doors.

Ensuring Proper Fit During Installation

  • Dry-Fit First: Temporarily place the new screen door into position before securing it permanently. This allows you to check alignment without making irreversible adjustments.
  • Use Shims If Necessary: If the frame isn’t perfectly square due to settling over time, shims can help align everything evenly.
  • Secure Hardware Properly: Tighten screws gradually on hinges and latches while checking that they don’t pull unevenly on one side.

Maintenance Tips Post-Replacement

  • Lubricate hinges every six months to prevent squeaking.
  • Clean screens regularly using mild soap and water.
  • Inspect hardware annually for signs of rust or wear and replace components as needed.

Replacing a screen door doesn’t have to be intimidating when you plan carefully and follow best practices at every step. A well-fitted screen door enhances both functionality and curb appeal while providing years of reliable use with proper maintenance.

Accurately Measuring Your Door Frame for Door Installation Alexandria, VA

Accurate measurements are the foundation of a successful screen door installation. Taking the time to measure properly ensures that your new screen door will fit securely and operate efficiently. Follow this guide to measure your door frame with precision.

Steps to Measure Your Door Frame with a Trusted Door Company in Alexandria, VA

  1. Gather Your Tools
    Before you begin, make sure you have the following tools on hand:
  2. Measuring tape (preferably metal for accuracy).
  3. Pencil or marker for notes.
  4. Paper or a notepad to record measurements.
  5. Measure the Width
    The width of your door frame should be measured at three points: top, middle, and bottom.
  6. Place the measuring tape horizontally at the top of the opening, spanning from one side of the frame to the other. Record this measurement.
  7. Repeat this step in the middle and at the bottom of the frame.
  8. Identify and note down which width is the smallest, as this will be your reference when purchasing a new screen door.
  9. Measure the Height
    Measure the height of your door frame at three locations: left side, center, and right side.
  10. Extend your measuring tape vertically from the top edge of the frame down to where it meets the threshold or floor.
  11. Record all three measurements and use the shortest height as your reference dimension.
  12. Check for Squareness
    A square door frame is critical for proper installation.
  13. Measure diagonally from one corner of the opening to its opposite corner (e.g., top-left to bottom-right).
  14. Repeat this step for the opposite diagonal (top-right to bottom-left).
  15. If both diagonal measurements are equal or close in size, your frame is square. Significant differences may require adjustment or trimming during installation.

Essential Tips for Accurate Door Repair in Alexandria, VA

  • Take Measurements Twice: Always double-check each measurement before recording it to prevent errors.
  • Account for Hardware Clearance: If you plan to add features such as handles or locks, ensure there’s enough clearance in your measurements.
  • Consider Thresholds: If there’s an existing threshold or incline at floor level, include these in your vertical measurement calculations.

Example Table for Recording Door Measurements

Measurement Point Width (inches) Height (inches)
Top 36 80
Middle 35 ¾ N/A
Bottom 35 ½ N/A
Left N/A 79 ¾
Center N/A 80
Right N/A 80

In this example, you would use 35 ½ inches as your reference width and 79 ¾ inches as your reference height when selecting a new screen door.

Final Checks Before Ordering Your Screen Door

Once you’ve taken all necessary measurements: – Compare them against standard screen door sizes available from manufacturers. – If there are significant irregularities in squareness or dimensions outside standard sizes, consider purchasing a custom-fit screen door.

By following these guidelines closely, you’ll avoid unnecessary issues during installation and ensure a seamless fit every time.

Measuring Your Door Frame Accurately for a New Screen Door Installation

Proper measurements are the foundation of a successful screen door installation. Without accurate dimensions, you could end up with a door that doesn’t fit correctly, leading to frustration, additional costs, and wasted time. This guide will help you measure your door frame precisely to ensure your new screen door fits seamlessly.

Why Accurate Measurements Matter

An ill-fitting screen door can cause issues such as:
– Gaps that let in insects or drafts
– Poor alignment, leading to difficulty in opening or closing
– Reduced durability due to improper installation stress

Taking precise measurements ensures the new screen door not only fits well but also performs effectively over time.

Tools You’ll Need

Before you begin measuring, gather the following tools:
Measuring tape (preferably one that measures in both inches and millimeters)
Pencil and notebook for recording dimensions
Straight edge or level (optional but helpful for verifying alignment)

Step-by-Step Instructions for Measuring

  1. Measure at three points: top, middle, and bottom of the door frame. Over time, frames can shift slightly out of square. Recording all three widths helps identify these variations.
  2. Write down each measurement and note any discrepancies. Use the smallest width as the final value when selecting your screen door.
  3. Similar to width, measure the height of the opening on both sides (left and right). If there’s any variation between these two measurements, use the shorter one to ensure proper installation.
  4. Include thresholds or bottom sills in your measurement if they exist.
  5. To verify that your frame is square, measure diagonally from one corner of the frame to its opposite corner. Then repeat this step for the other diagonal.
  6. If both diagonal measurements are equal (or within 1/16-inch variance), your frame is square. If not, note any misalignment so you can make adjustments during installation.
  7. Look for obstructions like handles, locks, or uneven surfaces around your existing frame that might interfere with installation.
  8. Note these details so adjustments can be made when choosing a replacement screen door.
Measurement Type Points to Measure Notes to Keep Final Value
Width Top/Middle/Bottom Smallest value among three Record smallest
Height Left/Right sides Shortest side if uneven Record shortest
Diagonal Corner-to-corner Note squareness differences Ensure within limits

Tips for Success

  • For older homes where frames might be significantly out of square or warped, consider consulting a professional before purchasing a replacement screen door.
  • Double-check all measurements before heading to purchase your new screen door.
  • If possible, bring your notes with you when shopping—you’ll often find doors labeled according to standard sizes based on width and height ranges.

By following these steps carefully and taking note of any irregularities in your frame’s structure, you’ll ensure an easier installation process while avoiding costly mistakes later during fitting or adjustment stages.

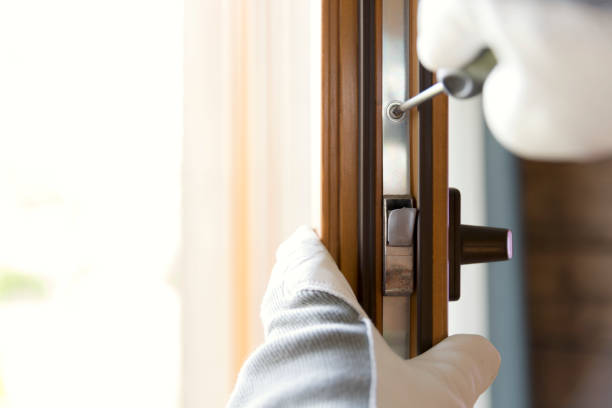
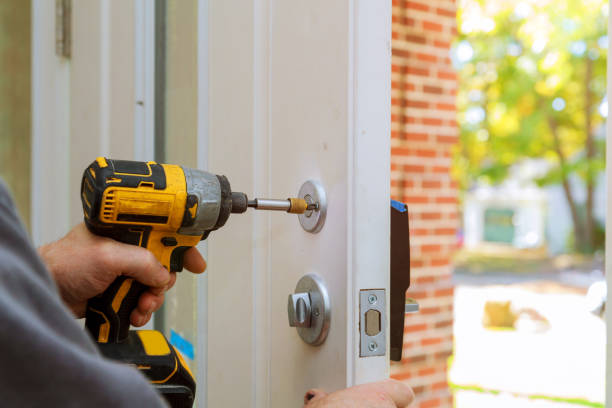
Construction worker installing window in house. Handyman fixing the window with screwdriver Construction worker installing window in house. Handyman fixing the window with screwdriver door repair stock pictures, royalty-free photos & images

Step-by-Step Guide to Removing the Old Screen Door for Seamless Replacement

Removing an old screen door is a crucial step in the replacement process. Proper removal ensures the new door will fit perfectly and prevents damage to your existing door frame. Below is a comprehensive guide to help you remove your old screen door safely and efficiently.

Tools You Will Need:

  • Screwdriver set (Phillips and flathead)
  • Pliers
  • Utility knife
  • Pry bar
  • Power drill (optional, for stubborn screws)
  • Safety gloves
  • Dust mask (if dealing with older materials)

Having these tools ready will make the process smoother and help avoid delays.

Step 1: Prepare the Work Area

Before starting, ensure that the area around your door is clear. Remove any obstacles such as furniture, rugs, or decor near the entryway. This will give you enough room to maneuver without risking injury or damage.

Pro Tip: Place a drop cloth on the floor beneath the work area. This will protect flooring from falling debris or scratches caused by tools.

Step 2: Inspect the Existing Screen Door

Take some time to closely examine how your current screen door is attached to its frame. Identify hinge locations, screws, and any additional hardware such as closers or chain attachments. This inspection will help you determine where to focus during removal.

Step 3: Remove Additional Hardware

  1. Detach any closers: Unscrew the brackets holding pneumatic closers in place on both ends.
  2. Remove security chains: Loosen screws using a screwdriver and carefully detach them.
  3. Set removed hardware aside: These pieces may be reusable if in good condition.

Use pliers if screws are too tight or stripped.

Step 4: Detach Hinges

  1. Start with the bottom hinge.
  2. Use a screwdriver or drill to unscrew each fastener.
  3. Hold onto the door as it detaches to prevent it from falling.
  4. Move up to subsequent hinges, working one at a time.
  5. Once all hinges are removed, carefully lift away the old screen door from its frame.

Safety Note: If your screen door is heavy or awkwardly sized, ask for assistance when lifting it off its hinges.

Step 5: Address Residual Adhesives or Paint

  • Use a utility knife to carefully scrape off dried caulk or adhesive.
  • Sand down rough patches gently with fine-grit sandpaper for smooth results.

This step is essential for ensuring flush installation of your new screen door.

Step 6: Inspect Frame Condition

  • Look for cracks, warping, or signs of rot (especially in wooden frames).
  • Tighten loose screws in surrounding trim if present.

If significant damage exists, consider repairing it before continuing with installation.

Final Checklist After Removal:

Task Status
All hardware removed safely
Frame cleared of obstructions
Frame inspected for damage

Completing these steps properly sets you up for an easier alignment and installation process when attaching your replacement screen door later on.

Installing the New Screen Door: Aligning, Securing, and Ensuring a Proper Fit

Properly installing a new screen door is crucial for achieving a functional, aesthetically pleasing, and durable result. Once your old screen door has been removed and your door frame has been prepped, follow these steps to ensure your new screen door is installed correctly. This guide will walk you through aligning the door, securing it in place, and making final adjustments for a precise fit.

Step 1: Preparing the Door Frame

  • Inspect for Levelness: Use a spirit level to confirm that the top and bottom edges of the frame are even. If adjustments are needed, sand down uneven areas or use shims to correct alignment.
  • Check for Obstructions: Remove any old hardware, caulk residue, or nails left behind from the previous installation.
  • Apply Weather Stripping: Consider adding weather stripping around edges for a better seal against drafts and insects.

Step 2: Aligning the Screen Door

  1. Positioning: Place the screen door into the opening while holding it upright. Ensure there is an even gap around all sides by using cardboard spacers or shims if necessary.
  2. Hinge Placement: Check that hinges align with corresponding points on both the screen door and frame.
  3. Pre-drilling Holes: Mark hinge screw locations on both surfaces with a pencil before drilling pilot holes.
Area Ideal Gap Size Notes
Top edge 1/8 inch Allows smooth closing
Bottom edge Up to 3/8 inch Accommodates floor clearance
Side edges (left/right) 1/16 – 1/8 inch Ensures proper latch contact

Step 3: Securing Hinges

Once aligned properly: – Attach hinges securely using screws sized appropriately according-to manufacturer instructions

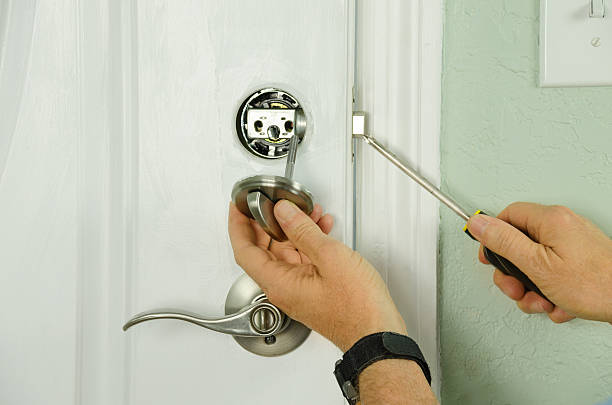
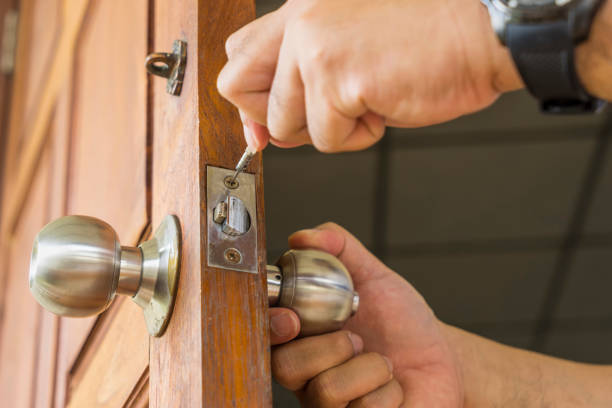
Home Improvements replacing door knob Homeowner changing out the door knobs. door repair stock pictures, royalty-free photos & images

Key Mistakes to Avoid During Door Replacement Alexandria, VA Projects

Replacing a screen door might seem like a straightforward task, but it requires precision and attention to detail. Small missteps can lead to poor functionality, reduced durability, or even unnecessary costs. Here is an overview of common mistakes people make during screen door replacement projects and how to avoid them.

Failing to Measure Accurately

One of the most common errors is inaccurate measurements of the door frame. A poorly measured door can result in gaps, difficulty closing the door, or improper alignment.

  • Solution: Always measure the height and width of the door frame at multiple points (top, middle, and bottom). Write down these measurements and double-check them before purchasing your new screen door.
  • Tip: Use a high-quality measuring tape for precise readings and account for any irregularities in your frame.

Choosing the Wrong Material

Selecting the wrong screen material can compromise durability or functionality. For example: – Fiberglass screens are cost-effective but less durable against pets. – Aluminum screens are sturdy but prone to dents. – Specialty materials like stainless steel mesh may be overkill unless you need enhanced security.

  • Solution: Consider your specific needs (e.g., pets, climate, security) before deciding on a material. Research thoroughly or consult with professionals if unsure.

Improper Alignment of Hinges

Improperly aligning hinges during installation can cause uneven stress on the frame or difficulty with opening and closing.

  • Solution: Use a level tool during hinge installation to ensure proper alignment. Mark hinge placement points carefully before drilling holes into the frame.

Overlooking Weatherstripping

Skipping weatherstripping is another common error that leads to poor insulation against drafts, bugs, and moisture.

  • Solution: Install weatherstripping along all edges of the screen door for improved energy efficiency and protection against outdoor elements.
Issue Result Solution
Inaccurate measurement Ill-fitting screen door Measure height/width multiple times
Misaligned hinges Uneven stress; poor closure Use a level tool during installation
No weatherstripping Drafts; pest entry Add weatherproof seals along edges

Using Incorrect Tools

Attempting installation without appropriate tools may lead to damaged materials or inefficient work processes.

Tools You’ll Need:

  1. Measuring tape
  2. Screwdriver (manual or power)
  3. Level
  4. Drill with bits
  5. Utility knife
  6. Safety gloves
  7. Tip: Gather all necessary tools beforehand for smoother execution.

Ignoring Manufacturer Instructions

Each screen door comes with specific instructions tailored to its design. Ignoring these directions often results in improper fitting or voided warranties.

  • Solution: Take time to read through all included documentation thoroughly before starting your project.

By avoiding these common mistakes, you’ll save time while ensuring that your new screen door fits perfectly and operates smoothly over time. Planning ahead, using appropriate tools/materials, and paying attention to details will set you up for success in your replacement project.

Tools, Materials, and Safety Gear Needed for a Successful Screen Door Installation

When preparing for a screen door installation, having the right tools, materials, and safety gear is essential for efficiency and precision. A well-prepared setup can save time and help avoid common installation pitfalls. Below is a detailed guide on everything you’ll need to ensure a smooth process.

Tools Required

  • Measuring Tape: Ensures accurate measurements of your door frame for proper fit.
  • Screwdriver (manual or power): Needed to remove old screws and secure the new door in place.
  • Power Drill: Speeds up the screw tightening process and may be necessary for creating new holes if required.
  • Level: Ensures that the screen door is aligned correctly, preventing uneven fits.
  • Pliers: Useful for removing staples or stubborn screws from the old installation.
  • Utility Knife: Can be used to trim excess material like weatherstripping or mesh if needed during adjustments.

Materials to Have on Hand

Material Purpose
Screen Door Kit The new screen door itself, often including hardware like hinges
Mounting Screws These will secure the frame onto the wall or existing structure
Weatherstripping Helps seal gaps around the screen door to improve insulation
Shims Small wedges that help align the screen door during installation
Wood Filler To repair or cover holes from previous mounts if needed

Safety Gear You’ll Need

  • Safety Glasses: Protect your eyes from debris while drilling or removing old parts.
  • Work Gloves: Reduce risks of cuts or splinters when handling materials and sharp tools.
  • Dust Mask (Optional): Ensures you don’t inhale dust particles if sanding down frames or surfaces.

Additional Tips on Preparation

  1. Before starting, double-check that all tools and materials listed are within easy reach.
  2. Confirm that your work area is well-lit to avoid mistakes during precise tasks like aligning hinges.
  3. Lay down a protective covering (such as a tarp) in your work area to catch debris and make cleanup easier.

By gathering everything in advance—and ensuring quality tools—you’ll set yourself up for success while minimizing potential frustrations during installation.

This comprehensive preparation helps streamline every step of replacing your screen door while maintaining professionalism throughout the process

Tools, Materials, and Safety Gear Needed for a Successful Screen Door Installation

Preparing for a screen door installation project involves gathering the right tools, materials, and safety gear. Proper preparation not only ensures a smoother process but also minimizes potential mistakes and enhances safety. Below is an essential guide to everything you’ll need to tackle your screen door installation with confidence.

Essential Tools for Screen Door Installation

  • Measuring Tape: Accurate measurements are crucial for ensuring the screen door fits perfectly within the frame.
  • Screwdriver (Phillips and Flathead): Most screen doors are secured with screws that will need tightening or loosening during installation.
  • Power Drill: A power drill speeds up the process of securing hinges and brackets compared to manual screwdrivers.
  • Level: Ensuring proper alignment is critical. A level helps confirm the door is straight both vertically and horizontally.
  • Utility Knife: Useful for trimming excess screening material or other adjustments as needed.
  • Rubber Mallet: Handy for gently tapping parts into place without causing damage to delicate components like frames or screens.

Key Materials You’ll Need

Material Purpose
Screen Door Kit The main component you’ll install, often pre-packaged with basic hardware like hinges and screens.
Screws Used to secure the frame, hinges, and other hardware in place.
Shims Help adjust for uneven surfaces or gaps in the door frame if necessary.
Silicone Sealant Provides added protection against air drafts and water infiltration around the edges of the frame.
Replacement Screen (if applicable) In case you’re only replacing damaged screen mesh rather than an entire door.

Safety Gear for Your Protection

  1. Safety Glasses: Shield your eyes from debris while drilling or cutting.
  2. Work Gloves: Protect your hands from cuts when handling sharp edges on screens, frames, or utility knives.
  3. Closed-Toe Shoes: Avoid injuries by wearing sturdy footwear that protects your toes from falling objects.
  4. Dust Mask (optional): Essential if sanding any surface near the door frame to create a snug fit.

Additional Tips for Success

  • Double-check all tools and materials before beginning work to avoid unnecessary trips to the hardware store.
  • Always work on a clean surface free from clutter to avoid accidents.
  • If working alone, use clamps to hold parts in place when necessary.
  • Test-fit all components before securing them permanently.

By ensuring you have all tools, materials, and safety gear ready before starting your installation project, you set yourself up for success while minimizing risks of delays or errors during replacement tasks.


Ultimate Guide to Doors Alexandria, VA: Enhancing Aesthetic and Security

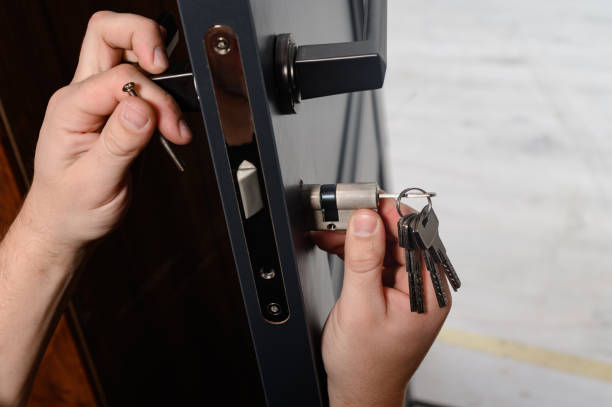
The master installs the core for the door lock, installation work with the door. The master installs the core for the door lock, assembly work with the door, the core with the keys. door repair stock pictures, royalty-free photos & images

Door installation is a critical aspect of home improvement that not only impacts the overall aesthetic appeal of your home but also plays an essential role in enhancing security. Choosing the right door, preparing for installation, and following proper techniques ensures both functionality and visual harmony. This guide provides an in-depth overview to help you understand the process effectively.

The Importance of Choosing the Right Door Company in Alexandria, VA

Installing a door may seem straightforward, but it directly affects two fundamental aspects of your home: appearance and security. A well-installed door serves dual purposes:

  • Aesthetic Appeal: Doors are one of the first things people notice about your house. The design, color, and material of your door can elevate the visual appeal of both your interior and exterior.
  • Home Security: A properly installed door acts as a robust barrier against intruders, ensuring peace of mind for homeowners.

Essential Tips for Door Repair Alexandria, VA Before Installation

  • Wooden Doors: Ideal for timeless elegance; offers excellent insulation but may require maintenance over time.
  • Steel Doors: Highly durable with superior security features; resistant to warping or cracking.
  • Fiberglass Doors: Low maintenance with versatile designs; suitable for energy efficiency.
  • Glass Panel Doors: Adds modern style; perfect for creating bright spaces but requires high-security locking systems.
  1. Ensure precise measurements of the existing frame to avoid fitting issues.
  2. Use tools like measuring tape, spirit levels, and squares to verify dimensions.
  3. Choose materials that can withstand local weather conditions (e.g., fiberglass doors for humid areas).
  4. Select a door style that complements your architectural theme (traditional homes pair well with paneled wood doors, while modern homes may favor sleek steel or glass panel designs).

Tools Required for Installation

Tool Purpose
Measuring Tape Ensures accurate dimensions
Level Checks alignment
Screwdriver Tightens hinges and locks
Hammer Drives nails as needed
Power Drill Speeds up screw placement
Utility Knife Trims insulation materials

Gathering these tools beforehand helps save time during installation.

Benefits of Proper Door Installation

  • Improved Energy Efficiency: Proper sealing around doors prevents drafts, reducing heating or cooling costs.
  • Enhanced Home Value: An upgraded entryway adds curb appeal while increasing property resale value.
  • Soundproofing Qualities: A well-installed door minimizes outdoor noise penetration into living spaces.

Additionally, regular maintenance post-installation will ensure long-term durability.

By following this guide closely and considering all vital elements involved in door installation projects, you can enjoy improved aesthetics without compromising on security benefits. Whether you’re updating an entryway or replacing interior doors, understanding these fundamentals enables a successful outcome tailored specifically to your needs and preferences.

Detailed Guide to Door Installation Alexandria, VA for Replacement Projects

Selecting the right type of door for a replacement project is a critical step in ensuring functionality, durability, aesthetics, and energy efficiency. With a variety of designs and materials available on the market, understanding the types of doors and their key features can help you make an informed decision. Below is an overview of some commonly used door types for replacement projects.

1. Exterior Doors

  • Front Entry Doors: These are typically made from durable materials such as fiberglass, steel, or solid wood.
  • Steel doors: Offer excellent security and insulation but may require periodic maintenance to prevent rust.
  • Fiberglass doors: Highly durable and low maintenance with customizable finishes that mimic wood.
  • Wooden doors: Provide timeless elegance but require regular upkeep due to susceptibility to weathering.
  • Patio Doors: These connect indoor living spaces with patios or backyards.
  • Sliding glass doors are space-saving options with large panels that allow natural light.
  • French doors exude charm while providing wide openings for easy access.
  • Storm Doors: Installed as a protective layer over entry doors, storm doors enhance energy efficiency while protecting the primary door from harsh weather.

2. Interior Doors

  • Panel Doors: These feature raised or recessed panels and are available in various configurations (e.g., two-panel, four-panel). They fit both traditional and contemporary interiors.
  • Flush Doors: Smooth-surfaced doors with minimalistic designs that work well in modern homes.
  • Sliding Barn Doors: Perfect for saving space while adding rustic or industrial charm to rooms like bedrooms or offices.
  • Pocket Doors: These slide into a wall cavity, making them ideal for areas where space is limited (e.g., bathrooms).

3. Specialty Doors

Specialty replacement doors address unique needs such as enhanced security, natural light integration, or aesthetic preferences.

  • Provide ample daylight while maintaining privacy with frosted or textured glass options.
  • Typically larger than standard hinged doors; they rotate on a central pivot hinge for modern design statements.
  • Constructed from reinforced steel or aluminum to maximize safety without compromising on style.

Comparison Table for Door Materials

Material Durability Maintenance Needed Cost Insulation Qualities
Fiberglass High Low Moderate Excellent
Steel Very High Moderate Affordable Good
Wood Medium High Expensive Good
Aluminum Medium Low Affordable Moderate

Factors to Consider When Choosing Replacement Door Types

  1. Determine whether you need an exterior door for security purposes or an interior door primarily for design aesthetics.
  2. Choose materials based on durability requirements, climate conditions in your area, and budget constraints.
  3. Ensure that the style of the replacement door complements your home’s architectural theme (e.g., modern vs traditional).
  4. Look out for energy-efficient designs featuring insulated cores or double-glazed glass panels.

By understanding these key types of replacement doors along with their unique features and purposes, you can select one that best meets your needs while adding value to your living space.

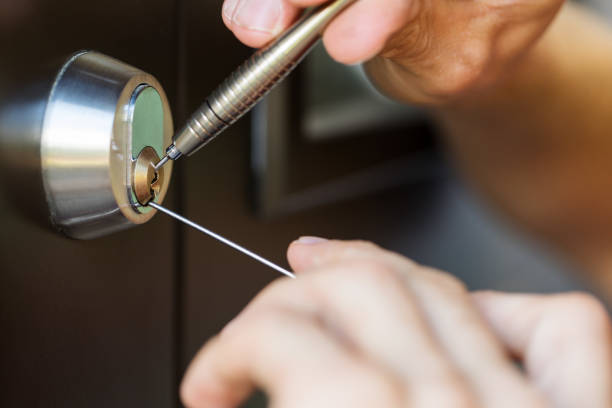
Repairing installing door deadbolt lock on house closeup Closeup of a professional locksmith is installing or repairing a new deadbolt lock on a house exterior door with the inside internal parts of the lock visible. door repair stock pictures, royalty-free photos & images

Essential Tips for Choosing the Right Replacement Doors for Your Home

Selecting the right replacement doors for your home is a critical decision that impacts both functionality and aesthetics. A thoughtfully chosen door not only enhances your home’s curb appeal but also provides security, energy efficiency, and long-term durability. Below are key factors to consider when choosing the ideal replacement doors.

Assess Your Needs

  • Purpose: Are you replacing an entry door, interior door, or patio door? Each serves a different function.
  • Security: Do you need a reinforced door with advanced locking mechanisms for added protection?
  • Insulation: Are energy efficiency and climate control primary concerns in your region?
  • Aesthetics: Should the replacement match your existing design theme or create a new visual statement?

Identifying these priorities will guide your selection process.

Select Durable Materials

Material Features Maintenance Requirements
Wood Classic, warm aesthetic with natural grains; customizable via staining High – requires regular sealing
Steel Highly secure; excellent insulation properties Low – occasional touch-ups needed
Fiberglass Durable; mimics wood appearance; energy-efficient Low – resistant to wear and tear
Aluminum Lightweight; corrosion-resistant Moderate – vulnerable to dents
Glass (with frame) Modern look; enhances natural light Moderate – prone to smudging

Evaluate which material aligns best with your home’s needs and style preferences.

Consider Door Styles

  • Panel Doors: Traditional designs featuring raised or recessed panels.
  • French Doors: Elegant double doors often used for patios or interiors.
  • Sliding Doors: Space-saving option suitable for patios or closets.
  • Dutch Doors: Split horizontally to operate top and bottom halves independently.
  • Barn Doors: Rustic style with sliding hardware perfect for interiors.

Make sure to choose a style compatible with your architectural theme while enhancing functionality.

Prioritize Energy Efficiency

  • Insulating cores (foam-filled steel or fiberglass doors).
  • Weatherstripping to seal gaps effectively.
  • Energy Star certifications indicating thermal performance.

A well-insulated door keeps drafts out during colder months and retains cool air during summer.

Measure Accurately

  1. Measure the height, width, and depth of the existing door opening.
  2. Note irregularities in the frame or surrounding structure.
  3. If unsure about specifics, consult with a professional installer.

Proper measurements eliminate installation delays due to sizing issues.

Match Hardware Finishes

Don’t overlook hardware details like handles, locks, hinges, and knockers. Coordinated finishes (e.g., brushed nickel, oil-rubbed bronze) enhance visual cohesion across your home’s decor elements.

Final Thoughts

Choosing replacement doors involves careful consideration of materials, style preferences, energy-efficiency features, and functional needs. By evaluating these factors methodically—and seeking professional advice when necessary—you can invest in doors that improve aesthetics while meeting practical expectations over time.

Essential Tips for Choosing the Right Replacement Doors for Your Home

Selecting the ideal replacement doors for your home is a critical step in achieving both functionality and style. The right door not only enhances the aesthetic appeal of your space but also improves security, energy efficiency, and overall comfort. Below are essential tips to help you make an informed decision when choosing replacement doors for your home.

Consider the Purpose of the Door

Different types of doors serve distinct purposes. Understanding the role of each door in your home will help narrow down your options:
Exterior Doors: Prioritize durability, energy efficiency, and security features. Exterior doors should be able to withstand weather conditions while adding curb appeal.
Interior Doors: Focus on design, space optimization, and noise reduction. Options such as sliding or pocket doors can save space in smaller rooms.
Garage or Utility Doors: Look for heavy-duty materials with insulation properties if these doors lead directly into living spaces.

Assess Material Options

Material Features
Wood Timeless and elegant but requires regular maintenance to prevent warping or rotting due to moisture exposure.
Steel Durable and secure; often includes foam insulation for energy efficiency but may dent over time.
Fiberglass Resistant to dents, scratches, and weather-induced damage; offers excellent insulation properties.
Aluminum Lightweight and corrosion-resistant but less insulated compared to other materials.
Glass (with frame) Modern look with natural light benefits; best when paired with strong framing materials like fiberglass or steel.

When evaluating materials, keep your local climate conditions in mind to ensure long-term performance.

Focus on Energy Efficiency

Energy-efficient doors help reduce heating and cooling costs by minimizing air leakage and improving thermal performance. Look for:
Insulated Cores: Materials like fiberglass or steel often include foam cores that enhance energy savings. – Energy Star Ratings: Certified options meet strict energy-efficiency guidelines. – Weather Stripping: Proper sealing around edges prevents drafts from entering or leaving your home.

Investing in an efficient door contributes not only to lower utility bills but also to environmental sustainability.

Prioritize Security Features

A secure door provides peace of mind by protecting against potential intrusions. Essential security features include: – Solid-core construction (especially important for exterior doors).
– Multi-point locking systems that engage at various points along the frame. – Reinforced frames made from robust materials like steel. – Impact-resistant glass if incorporating windows into exterior designs.

Additionally, opt for tamper-proof hinges on outward-swinging entryways.

Match Style with Your Home’s Aesthetic

Your replacement door should complement the architectural style of your house while reflecting personal preferences: 1. For traditional homes – Panel designs with detailed moldings work well. 2. For modern homes – Sleek finishes such as smooth fiberglass or large glass panels add contemporary flair. 3. For rustic settings – Distressed wood or wrought iron accents provide charm.

Door hardware (e.g., knobs/handles) can further customize its look—ensure they coordinate with interior decor elements.

Measure Accurately Before Purchase

Correct measurements are crucial when selecting a replacement door—doors that don’t fit snugly can lead to structural gaps or poor insulation performance: 1. Measure width across top/middle/bottom sections within existing frames. 2. Record height from floor level up through header areas. 3. Confirm depth/thickness based on jamb dimensions if applicable.

Professional installers often recheck dimensions before finalizing orders—consider seeking advice during this stage if uncertain about DIY measurements.

By carefully considering these factors—from purpose-specific functionality through visual compatibility—you’ll ensure satisfaction both aesthetically & practically after installation is complete.

The Importance of Hiring a Professional for Door Replacement Alexandria, VA

When it comes to installing doors, whether it’s a front entry door, patio door, or interior door, the quality of the installation is just as important as the quality of the door itself. While it may be tempting to take on this project yourself or hire an inexperienced contractor to save costs, there are several compelling reasons why hiring a professional door installer is essential for achieving high-quality results.

Expertise and Precision

  • Proper measurements: Even minor errors in measurements can lead to gaps around the frame that compromise energy efficiency and security. Professionals use precise tools and methods to ensure exact fitment.
  • Correct alignment: An improperly aligned door may not close or latch correctly. Experts will fine-tune hinge placement and adjust frames to ensure smooth operation.
  • Structural integrity: Installers are skilled at reinforcing areas such as thresholds and jambs for added durability over time.

Ensuring Energy Efficiency

A poorly installed door can allow drafts to seep into your home, leading to higher energy bills due to heating or cooling loss. Professionals know how to properly seal gaps using weatherstripping, caulking, or foam insulation for optimal thermal performance. This not only improves energy efficiency but also enhances indoor comfort throughout the year.

Aspect DIY Installation Risks Professional Installation Benefits
Measurements Risk of gaps or uneven edges Precise cutting and sizing
Energy Efficiency Possible air leaks Proper sealing techniques
Durability Risk of incorrect reinforcement Ensures long-lasting functionality

Enhanced Security Features

One critical aspect of professional installation is ensuring that your new door provides maximum security. Professionals understand how to install locking mechanisms like deadbolts and strike plates properly so they function effectively against forced entry attempts. They also secure hardware such as hinges with specialized tools designed for tamper-proofing.

Time-Saving Convenience

Installing a door can be a time-consuming process requiring specialized equipment and tools that most homeowners do not own. A professional installer can complete the project quickly while adhering to industry standards—saving you time without compromising quality.

Warranty Protection

Many manufacturers require professional installation for their product warranties to remain valid. By hiring an experienced installer:
– You protect your investment in case manufacturing defects arise later. – The installer may also provide their own labor warranty for added peace of mind.

Avoiding Common DIY Mistakes

Attempting a DIY approach often leads to common mistakes such as splitting wood frames while drilling holes or misaligning hinges during installation. These errors not only increase costs but may damage the structural integrity of your home’s entryway or interior spaces.

Final Thoughts on Professional Installation

Hiring a professional door installer is an investment in the longevity, functionality, and security of your new doors. Their skills help you avoid costly mistakes while ensuring seamless performance over time—all while enhancing both aesthetic appeal and practical benefits for your home environment.


Essential Tips from a Door Company in Alexandria, VA for Replacing Your Entry Door

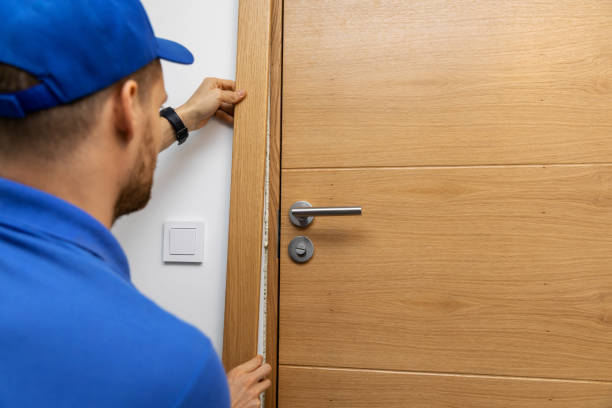
man installing door architrave man installing door architrave door repair stock pictures, royalty-free photos & images

Replacing your entry door is not only about improving the aesthetics of your home but also enhancing its security, energy efficiency, and overall functionality. Before diving into this project, there are several factors to keep in mind in order to ensure a seamless and successful upgrade.

Evaluate the Purpose of Your Entry Door Replacement

Understanding why you want to replace your current door is key to selecting the right replacement. Common reasons include:
Improved Curb Appeal: A new entry door can significantly enhance your home’s exterior appearance.
Enhanced Security: Upgrading to a more robust model can provide better protection against potential intruders.
Energy Efficiency: Modern entry doors often come with improved insulation and energy-saving features that reduce heating and cooling costs.
Better Functionality: Over time, doors may warp or stick, making them harder to operate.

Clearly identifying your goals will help guide decisions throughout the process.

Key Factors to Take Into Account

  1. Establishing a budget is crucial. Entry doors range from affordable pre-fabricated options to custom-made designs with premium materials.
  2. Don’t forget additional costs such as hardware (handles, locks) or professional installation services if needed.
  3. Different materials offer varying benefits. For instance: | Material | Advantages | Drawbacks | |—————–|———————————————|——————————————–| | Steel | Durable, secure, and low-cost | Can dent or rust over time | | Fiberglass | Energy-efficient, low maintenance | Higher price point | | Wood | Attractive and high-end look | Prone to warping or rotting if untreated |
    • Choose based on durability, appearance, and maintenance preferences.
  4. Local weather conditions play a role in choosing an appropriate material.
  5. For humid areas, fiberglass or vinyl may resist moisture better than wood.
  6. Look for ENERGY STAR-rated doors which are designed for thermal performance.
  7. Consider features like double-pane glass inserts or insulated cores that help regulate indoor temperatures effectively.
  8. Thoroughly measure your existing space to ensure proper fit.
  9. Decide whether professional assistance is necessary based on the scope of work involved (e.g., reframing).

Visual Appeal and Style

An entry door contributes greatly to your home’s curb appeal: – Choose a style that complements your home’s architecture—whether contemporary, traditional, or craftsman designs. – Customize with accent features like sidelights or decorative glass panels for added elegance.

Color selection also matters; bold hues can make a statement while neutral tones provide timeless sophistication.

Maintenance Needs

Finally, think long-term: – How much upkeep does the material require? Steel might need periodic repainting; wood demands sealing against moisture damage. – Ensure proper weather stripping installation for reduced wear-and-tear over years of use.

By carefully evaluating these aspects beforehand, you’ll be well-prepared when selecting the perfect entry door replacement for both function and style purposes!

Tips for Assessing Your Door Before Starting a Door Installation in Alexandria, VA

Before deciding to replace your entry door, it’s critical to evaluate the condition of your existing door. This step ensures that you fully understand the issues at hand and can make informed decisions about what needs improvement. Below are some key factors to consider when assessing your door’s condition.

Ensuring Structural Integrity with Expert Door Repair in Alexandria, VA

Examine the structural condition of your current door for signs of wear or damage. Look for:
Warping: Check if the door is bent or twisted, which can prevent it from closing properly.
Cracks or Splits: These may compromise the door’s strength and insulation capabilities.
Rot or Decay: If your door is wooden, inspect for rot around the edges, particularly at the bottom where moisture tends to accumulate.

Functionality

Evaluate how well your current door functions on a day-to-day basis:
– Does it open and close smoothly without sticking?
– Is it difficult to lock or unlock? This may indicate alignment issues or worn-out hardware.
– Are there drafts coming through even when closed tightly?

These issues might indicate that replacement is more cost-effective than repairs.

Aesthetics and Curb Appeal

Consider whether your current entry door complements the style of your home:
– Does it look outdated or no longer match modern design trends?
– Are there visible scratches, dents, or peeling paint?
An unattractive entryway can negatively affect both curb appeal and property value.

Energy Efficiency

Older doors often lack sufficient insulation, leading to energy loss. Assess these points:
– Inspect weatherstripping for gaps that allow air leakage.
– Check if there’s condensation on glass panels (if any), which could indicate poor thermal performance.

Consider using an infrared thermometer around the edges of the doorframe to detect temperature variations.

Security Issues

Your entryway plays a vital role in protecting your home from intruders. Inspect for potential security vulnerabilities:
| Factor | Questions to Ask | Possible Solutions |
|—————————|—————————————————————|—————————————-|
| Door Lock Mechanism | Is it easy to tamper with or outdated? | Upgrade to deadbolt locks |
| Door Frame Durability | Is the frame weak or damaged from previous forced entries? | Reinforce with strike plates |
| Material Weakness | Can it be easily broken into due to its material type (e.g., hollow core)? | Replace with steel/fiberglass options |

Checklist for Assessment

Use this quick checklist during your evaluation:
1. Look for physical damage such as cracks, warping, and rot.
2. Test functionality by opening/closing multiple times under different conditions (e.g., humid vs dry days).
3. Inspect hardware like hinges and locks for rust, wear, or misalignment issues. 4. Feel around edges for drafts indicating poor insulation. 5. Evaluate overall aesthetics—does it enhance or detract from your home’s appearance? 6. Check security features such as lock sturdiness and frame quality.

By carefully assessing these factors, you’ll have a clear idea of whether repair work is sufficient or if investing in a new entry door would be more beneficial in terms of both functionality and long-term value.

Selecting the Best Material for Door Replacement Alexandria, VA

Selecting the right material for your new entry door is a crucial step in ensuring durability, energy efficiency, and aesthetic appeal. Each material comes with its own set of advantages and disadvantages, so it’s important to consider your specific needs, budget, and style preferences when making a decision.

Common Door Materials

1. Wood

  • Pros:
    • Timeless and classic look that complements various architectural styles.
    • Can be customized with different finishes, stains, or paints.
    • Excellent insulating properties against temperature changes.
  • Cons:
    • Prone to warping or swelling when exposed to extreme moisture or humidity.
    • Requires regular maintenance like sealing or painting to prevent damage over time.

2. Steel

  • Pros:
    • Highly durable and resistant to dents or cracks.
    • Offers excellent security due to its strength.
    • Relatively affordable compared to other materials.
  • Cons:
    • Poor resistance to rust unless properly coated or maintained.
    • Limited design versatility compared to wood.

3. Fiberglass

  • Pros:
    • Exceptional durability and resistance to weather conditions like rain and heat.
    • Requires minimal maintenance—won’t warp, rot, or crack over time.
    • Can mimic the appearance of wood while offering better resilience.
  • Cons:
    • Higher upfront cost compared to steel doors.
    • May not provide the same luxurious feel as authentic wood.

4. Aluminum

  • Pros:
    • Lightweight yet sturdy material that resists corrosion effectively.
    • Available in a range color finishes without frequent up-keep..

Energy Efficiency Considerations for Doors in Alexandria, VA

When replacing your entry door, energy efficiency is a key factor to consider. Choosing an energy-efficient door not only helps reduce your utility bills but also contributes to creating a more comfortable and environmentally friendly home. Below are some important factors to keep in mind when evaluating the energy efficiency of your new door.

Look for Energy Star Certification

An easy way to identify energy-efficient doors is by checking for the Energy Star certification label. This certification ensures that the door meets or exceeds rigorous energy performance standards set by the U.S. Environmental Protection Agency (EPA). Doors with this label are tested for thermal insulation, air leakage, and overall performance in various climates.

Choose the Right Material

Material Pros Cons
Fiberglass Excellent insulation; durable; low maintenance Can be more expensive upfront
Steel Good insulation; cost-effective Susceptible to dents and scratches
Wood Traditional, classic look Prone to warping or rotting if untreated

Consider opting for insulated cores (common in steel and fiberglass doors), which help improve thermal performance by reducing heat transfer.

locksmith have to fix silver knob wood door and locksmith maintain silver knob door repair stock pictures, royalty-free photos & images

Evaluate the Door’s U-Factor and Solar Heat Gain Coefficient (SHGC)

  • U-Factor: Measures the rate of heat loss through the door. A lower U-factor indicates better insulation.
  • SHGC: Indicates how well the door blocks solar heat gain. Lower SHGC values are recommended in warmer climates, while higher values may be suitable for colder regions to harness natural heating.

Look for doors that strike a balance between these ratings based on your local climate.

Invest in Quality Weatherstripping and Sealing

  • Install high-quality weatherstripping material along the edges of your door.
  • Ensure that thresholds are tight-fitting without gaps.
  • Use caulk or foam sealant along any cracks or openings around the frame.

These measures will help prevent drafts, air leakage, and moisture infiltration.

Consider Glazed or Glass Panels Wisely

If you’re opting for a door with glass panels, ensure they feature double or triple glazing with low-emissivity (low-E) coatings. Such features minimize heat transfer while allowing natural light into your home. Additionally, look for argon gas fills between panes to further enhance insulation properties.

Benefits of an Energy-Efficient Entry Door

  • Lower Utility Costs: Minimized heat loss or gain reduces dependence on heating/cooling systems.
  • Improved Comfort: Better temperature regulation throughout all seasons.
  • Environmental Impact: Reduced carbon footprint thanks to decreased energy consumption.
  • Higher Resale Value: Modern buyers often prioritize homes with sustainable features like efficient doors and windows.

By prioritizing these considerations during installation, you can ensure that your new entry door delivers lasting value while supporting your home’s overall efficiency goals.

Security Features to Look for in a Replacement Entry Door

When replacing your entry door, security should be one of the top considerations. Your front door is the primary point of entry to your home and serves as a critical barrier against unauthorized access. Below, we explore key security features to look for when selecting a replacement entry door.

1. Material Strength and Durability

  • Steel Doors: Known for their strength and durability, steel doors are highly resistant to forced entry. Many also come with reinforced cores for added protection.
  • Fiberglass Doors: Fiberglass doors are durable and resist warping or cracking while providing good insulation and security when paired with a strong frame.
  • Solid Wood Doors: Solid wood is attractive and sturdy; however, it may be prone to weather-related wear without proper maintenance. Consider models reinforced with metal or composite cores for added strength.

2. Multi-Point Locking Systems

Look for doors equipped with multi-point locking systems, which engage at multiple points along the frame rather than just at the handle area. This setup makes it significantly harder for intruders to force the door open.

Key benefits include:
– Reduced likelihood of tampering or forced entry. – Even pressure distribution along the door frame, increasing longevity.

3. Reinforced Door Frames

Even the strongest doors can fail if they’re installed in weak frames. Select a replacement door that comes with a reinforced steel or composite frame designed specifically to resist impact and kicking attempts.

Tips for reinforced frames:
– Opt for frames with deep strike plates (at least 3 inches long).
– Ensure screws penetrate deeply into the wall stud rather than just the wooden trim around the door.

4. Impact-Resistant Glass Options (If Applicable)

If you’re choosing an entry door with glass panels, prioritize options designed with laminated security glass or double/triple-pane tempered glass features.

Glass considerations include:
– Laminated glass holds together even when shattered due to its inner layer film. – Impact-rated glass provides extra resistance against breaking due to blows or projectiles.

Glass Type Security Level Additional Features
Laminated Glass High Shatter-resistant layer inside
Tempered Glass Moderate Breaks into small blunt pieces
Wired Glass Moderate Embedded wire prevents shattering

5. Advanced Lock Technology

  • Smart Locks: These allow you to control access remotely via smartphone apps or keypads.
  • Grade 1 Deadbolts: Look for ANSI-certified Grade 1 deadbolts, offering maximum strength.

Advantages of advanced locks include: – Increased convenience (no physical keys required). – Customized access codes for family members or guests.

6. Peepholes and Security Cameras

Key features: – Wide-angle peepholes let you see visitors clearly without opening. – Smart cameras can send real-time video feeds directly to your devices.

Security starts at your front door, so investing in these features ensures enhanced peace of mind without compromising on style or functionality during your upgrade process.

Professional Installation vs. DIY: Making the Best Choice for Your New Door

When it comes to replacing your entry door, one of the most important decisions you’ll need to make is whether to handle the installation yourself or hire a professional. Both options have their merits and drawbacks, so understanding the factors involved can help you make an informed choice.

Benefits of Professional Installation

  • Expertise and Experience: Professionals are trained to handle complex installations, ensuring all components fit properly and function as intended.
  • Warranty Protection: Many manufacturers require professional installation for their warranties to remain valid. Skipping this step could void coverage for defects or other issues.
  • Time Savings: A professional can complete the job quickly and efficiently, saving you from potential delays caused by trial-and-error or unexpected challenges during installation.
  • Specialized Tools: Professionals have access to tools that may be costly for a DIYer to purchase or rent, such as specialized drills, levels, or saws.
  • Comprehensive Service: A contractor often handles additional tasks like removing old doors, adjusting framing, and weatherproofing for long-term durability.

When DIY Installation May Be Right for You

  • Cost Savings: Installing the door yourself eliminates labor costs associated with hiring a professional.
  • Smaller Budget Projects: If you’re working on a budget and already own most of the necessary tools, DIY could stretch your dollars further.
  • Hands-On Homeowners: For those who enjoy tackling home improvement projects themselves, this process can offer personal satisfaction.

However, it’s important to note that improper installation could lead to issues like drafts, misalignment, or even security vulnerabilities.

Key Factors to Consider

Factor Professional Installation DIY Installation
Skill Level Suitable for all skill levels Requires experience with tools
Cost Higher due to labor fees Lower upfront costs
Time Commitment Minimal time investment May take longer depending on skills
Tools Required Provided by installer Must be purchased or rented
Long-Term Outcomes Likely higher-quality results Variable based on skill level

Tips for Hiring a Professional

  1. Research Contractors: Look for licensed professionals with good reviews online or recommendations through trusted sources like friends or family.
  2. Request Quotes: Obtain multiple quotes for comparison but avoid automatically choosing the cheapest option; quality work comes at a fair price.
  3. Check Credentials: Verify that contractors are insured and certified according to local regulations.
  4. Ask About Warranties: Ensure both the materials and labor come with adequate warranty protection.

Tools Needed for DIY Door Installation

  • Measuring tape
  • Power drill and screwdriver bits
  • Saw (hand saw or circular saw)
  • Pry bar (for removing old frames)
  • Hammer and nails/screws
  • Level (to ensure proper alignment)
  • Caulk gun (for sealing edges)

Remember that precise measurements and alignment are critical during every step of the project.

Choosing between professional installation vs. DIY ultimately depends on your priorities—whether it’s cost savings, quality results, or time efficiency—so weigh these aspects carefully before proceeding with your new entry door project.

Professional Installation vs. DIY: Making the Best Choice for Your New Door

When it comes to upgrading your entry door, deciding between professional installation and a DIY approach is a significant decision. While both options have their advantages, understanding the pros and cons of each can help you choose the best path based on your needs, skills, and budget.

Benefits of Professional Installation

  • Expertise and Precision: Professionals have the necessary experience to handle complex installations, ensuring that every component—such as hinges, alignment, and seals—is perfectly fitted.
  • Time Savings: A trained installer can complete the job quickly without compromising quality, saving you from lengthy delays caused by inexperience.
  • Warranty Protection: Many manufacturers require professional installation to maintain warranty coverage. Hiring a certified installer protects your investment if issues arise later.
  • Specialized Tools: Door installation often requires tools like power drills, saws, chisels, or leveling devices. Professionals already have access to these tools and know how to use them effectively.

When DIY Might Be a Good Option

  • Cost Savings: Installing the door yourself eliminates labor costs associated with hiring professionals.
  • Personal Satisfaction: Successfully completing a DIY project can be incredibly rewarding if you enjoy hands-on work around the home.
  • Flexibility with Timing: You’re in control of scheduling when you install the door yourself.

However, it’s important to consider whether your skills align with what is required. Improper installation can lead to problems like drafts or security vulnerabilities.

Comparing Time and Costs: Professional vs. DIY

Factor Professional Installation DIY
Average Cost $300–$800 (excluding door cost) $0–$200 (tools/materials)
Time Required 3–6 hours 1–2 days (depending on skill)
Warranty Impact Maintains warranty May void manufacturer’s warranty
Risk of Errors Minimal Moderate to high

Key Factors to Consider Before Deciding

  1. Skill Level: Assess whether you have prior experience with carpentry or similar tasks.
  2. Tools Availability: Determine if you already own specialized tools or are willing to invest in them.
  3. Door Type Complexity: Certain doors—like double-entry or custom-shaped doors—may require advanced techniques better handled by professionals.
  4. Time Commitment: Decide whether dedicating an entire weekend (or more) fits into your schedule.

Final Thoughts on Choosing the Right Option

For homeowners seeking precision and efficiency while avoiding potential headaches, professional installation is often worth the investment. However, if budget constraints are paramount or if you’re confident in tackling home improvement projects independently, a well-researched DIY approach may meet your needs.

Carefully weigh these considerations before starting your entry door replacement project—it will ensure both functionality and long-term satisfaction with your new door upgrade.


Comprehensive Guide to Door Repair Alexandria, VA: How to Replace Your Front Door

Assembly of lock with handles and latch for an interior door. Assembling lock with door knobs and latch in living room. door repair stock pictures, royalty-free photos & images

Replacing your front door can transform the appearance, security, and energy efficiency of your home. Whether you are upgrading for aesthetic reasons or improving functionality, understanding the process is essential. This guide provides a comprehensive overview of replacing your front door.

Benefits of Replacing Your Front Door

  • Improved Curb Appeal: A new door enhances the overall look of your home, making it more inviting.
  • Better Security: Modern doors often come with improved locking mechanisms and durable materials for added security.
  • Energy Efficiency: Many new doors feature better insulation and weatherstripping, reducing drafts and lowering energy bills.
  • Increased Home Value: Upgrading your front door can boost property value due to its functional and aesthetic benefits.

Preparing for Door Replacement

  1. Measure the height, width, and depth of your current door to ensure an accurate fit for the replacement.
  2. Note whether you have a standard-sized or custom-sized frame.
  3. Select a material that aligns with your needs (wood, fiberglass, steel). Each material has unique benefits in terms of durability, style, and maintenance.
  4. Decide on design features like windows, paneling styles, or finishes.
  5. Check Building Codes and HOA Rules (if applicable)
  6. Verify that the new door meets local codes or homeowner association regulations.
  7. Gather Necessary Tools and Supplies (see tool list below).

Essential Tools for Replacing Your Front Door

Tool/Material Purpose
Measuring tape For accurate dimensions
Pry bar To remove old trim or framing
Screwdriver/Drill For removing screws from hinges
Hammer To adjust nails during removal
Utility knife To cut caulking or paint around old trim
Weatherstripping For sealing gaps after installation
Level To ensure proper alignment

Optional but useful items include foam insulation spray (to fill gaps) and a saw (if trimming is required).

Step-by-Step Process to Replace Your Front Door

  1. Begin by unscrewing hinges with a drill or screwdriver.
  2. Use a pry bar to carefully remove any surrounding trim or molding.
  3. Check the existing frame for signs of damage such as rot or cracks.
  4. If damaged, repair or replace the frame before proceeding with installation.
  5. Clean out debris from the frame area.
  6. Ensure that all surfaces are level for proper alignment during installation.
  7. Place the new door in its opening to confirm fitment.
  8. Make minor adjustments if necessary using shims or trimming tools.
  9. Align hinges with pre-drilled holes on both the frame and door.
  10. Secure them tightly using screws while confirming smooth movement when opening/closing.
  11. Apply weatherstripping around edges for better insulation.
  12. Use caulk along seams where air might leak through.
  13. Add back decorative trim pieces around your doorway for a polished finish.
  14. Test Functionality Verify that locks work smoothly and inspect gaps around edges after installation is complete.

Tips for Success During Installation

  • Always double-check measurements before making permanent modifications like cutting or drilling holes in frames.
  • Work slowly during alignment steps since small changes can significantly impact how well your new front door operates over time.
  • Enlist help if needed—the weight of certain doors can make solo handling challenging without assistance.

Replacing your front door may seem daunting at first but following these clear steps ensures a successful transformation tailored specifically toward improving appearance while maintaining long-term durability throughout years ahead!

A Step-by-Step Guide to Replacing Your Front Door for a Professional Finish

Replacing your front door can significantly enhance the curb appeal, security, and energy efficiency of your home. While the process may seem daunting at first, following a systematic approach ensures a professional-quality result. Below is a detailed guide to walk you through the steps of replacing your front door.

Step 1: Measure Your Existing Door and Frame

  • Door Dimensions: Measure the height and width of your current door. Ensure you measure across the widest and tallest points in case of inconsistencies.
  • Frame Depth: Check how deep the frame is to ensure compatibility with the new door.
  • Rough Opening: Remove any trim around the door to measure the rough opening size (the opening in the wall behind the frame).
  • Hinge and Lock Placements: Mark where hinges and locks are located on your current door as this may influence your choice.

Pro Tip: Double-check all measurements before purchasing your new door to avoid costly mistakes.

Step 2: Gather Essential Tools and Materials

  • Screwdriver set (flathead and Phillips)
  • Pry bar or crowbar
  • Hammer or mallet
  • Utility knife
  • Measuring tape
  • Level tool (24” or longer)
  • Power drill with bits for screws and pilot holes
  • Insulation material (foam or weatherstripping)

Additionally, depending on whether you’re keeping or replacing the frame, you may need shims, finishing nails, caulk, wood filler, paintbrushes, or touch-up paint.

Step 3: Remove the Old Door and Frame Components

  1. Unscrew hinges from both sides using a screwdriver.
  2. If applicable, remove existing hardware such as knobs, locks, deadbolts, or peepholes.
  3. Use a pry bar to loosen trim pieces without damaging surrounding walls.
  4. If replacing the entire frame, use caution when removing it so you don’t harm adjacent structures.

If you’re keeping the original frame intact but upgrading only the door slab itself—clean all edges thoroughly before proceeding.

Step 4: Fit and Adjust Your New Door

  1. Place new doors into their designated openings temporarily (“dry-fitting process”). Check alignment using levels. 2 . Make certain there’s space evenly distributed beneath thresholds while ensuring side gaps remain consistent along lengthwise borders.

Breaking Down the Door Installation Alexandria, VA Process: Are Front Doors Hard to Install?

Installing a front door can seem like a challenging task, especially for those unfamiliar with home improvement projects. However, by breaking the process into manageable steps and understanding the key considerations, it is possible to demystify the task. Whether you are a DIY enthusiast or simply curious about what door installation entails, this guide will offer you clarity.

Factors That Influence Installation Difficulty

  1. Pre-hung doors (which include the frame): Easier to install because they come as a single unit.
  2. Slab doors (just the door itself): Require more precision and adjustments, as you must fit them into an existing frame.
  3. A structurally sound frame makes installation straightforward.
  4. If there’s damage such as rot or warping, replacing or repairing the frame adds complexity.
  5. Having the right tools makes tasks like leveling, measuring, and fastening more manageable.
  6. First-time installers may face a steeper learning curve compared to experienced professionals.
  7. Custom-sized doors may require trimming or resizing, which can complicate installation.
  8. Additional features like sidelights or transoms also increase difficulty.

Step-by-Step Breakdown of Door Installation

  1. Remove the existing door by unscrewing hinges and carefully lifting it out.
  2. Inspect the old frame for damage such as rot or wear; repair if necessary.
  3. Measure accurately to ensure your new door fits properly in terms of height, width, and depth.
  4. Place the pre-hung unit into position within the rough opening.
  5. Use shims along both sides to center and level it evenly.
  6. Secure it with screws through the provided holes in the jambs.
  7. Align hinges on both the new slab door and existing frame before attaching them securely.
  8. Test hinge alignment by swinging open/closed—adjustments may be needed for smooth functionality.
  9. Apply weatherstripping around edges to improve insulation and energy efficiency.
  10. Add caulking around exterior trim for weatherproofing purposes.
  11. Install hardware such as locks or handles to finish up.

Tools Often Required for Door Installation

Tool Purpose
Measuring tape Ensures dimensions are accurate
Level Verifies correct alignment
Screwdriver/Drill Secures screws swiftly
Pry bar Assists in removing old components
Saw (if needed) Trims excess material from frames/doors
Caulk gun Applies sealant neatly around trim
Shims Helps create balance during adjustment

Common Challenges During Door Installation

  • Misaligned Hinges: Can cause difficulty opening/closing; adjustments are typically required post-installation.
  • Improper Sealing: Without sufficient caulking or weatherstripping, drafts can occur around edges.
  • Measurement Errors: Small inaccuracies result in doors that don’t fit properly within their frames.

For beginners tackling their first project alone, patience is key when overcoming these challenges.

Professional vs DIY Considerations

  • If structural repairs (e.g., replacing rotten frames) are required
  • When dealing with large custom doors that need precise fitting techniques
  • For homeowners short on time who prefer expert-level results

By understanding your skill set and assessing each project individually based on these criteria above—whether simple or complex—it becomes easier to determine if tackling this task yourself is feasible or better left in professional hands

close-up locksmith repair silver lock on wood door close-up locksmith repair silver lock on wood door - can use to display or montage on product door repair stock pictures, royalty-free photos & images

Understanding Door Replacement in Alexandria, VA: Is Installing Front Doors Difficult?

Installing a front door can seem like a daunting project, especially for homeowners attempting it for the first time. However, with proper preparation, understanding of the process, and the right tools, it’s a task that many can accomplish. Below is a comprehensive breakdown of what makes front door installation challenging and how to approach it step by step.

Factors That Impact Door Installation Difficulty

  • Door Type and Material
    Heavier doors made from materials like solid wood or steel may require additional effort compared to lightweight fiberglass or composite doors.
  • Door Frame Condition
    If the existing frame is damaged, warped, or out of alignment, you may need additional repairs before installing the new door.
  • Measurement Accuracy
    A poorly measured frame can lead to improper fitting of the door, which could cause air drafts or security vulnerabilities.
  • Required Adjustments
    Older homes often have non-standard door frames that require more cutting and customization for proper fitting.

Breaking Down the Installation Process

  1. Preparation
    Before beginning any installation work:
  2. Remove any old hinges and hardware from the existing frame.
  3. Measure the width, height, and depth of your entryway to ensure your new door fits perfectly.
  4. Gather all necessary tools (see “Essential Tools” below).
  5. Removing the Old Door
    Carefully unhinge and remove your old front door. Check for damage in areas like:
  6. The threshold
  7. The jambs
  8. Surrounding trim and weatherstripping
  9. Inspecting & Preparing the Frame
    If there are signs of rot or misalignment in your frame:
  10. Address these issues before proceeding with installation.
  11. Use shims where necessary to ensure everything is level.
  12. Installing the New Door
    Steps include:
  13. Positioning your new door in place.
  14. Securing it temporarily while making adjustments.
  15. Attaching hinges properly and ensuring smooth operation during opening/closing.
  16. Adding Finishing Touches
    Finish by installing weatherstripping, seals, handles/knobs, locks, and any other hardware included with your new door.

Challenges You Might Encounter

  • Misaligned hinges causing difficulty in hanging or leveling.
  • Damage when removing an old frame (especially if it’s been painted over multiple times).
  • Difficulty securing screws into uneven surfaces like aged wood or brick structures.

Addressing these issues requires patience as well as knowledge about structural repairs beyond basic carpentry skills.

Should You Seek Professional Help?

  • If you lack confidence in using saws/drills safely—or working around heavy materials—it’s wise instead hire professionals who specialize specifically here ensuring secure longevity+ safety overall .

Should You Replace Doors Alexandria, VA Yourself or Hire a Professional?

Replacing your front door can significantly enhance the aesthetic and security of your home. However, deciding whether to tackle the project yourself or hire a professional depends on various factors such as your skill level, the complexity of the job, and your budget. Here’s an in-depth look at what you should consider before making a decision.

Assessing Your Skill Level

  • Do you have prior experience with DIY projects?
  • Are you comfortable using tools like drills, saws, levels, and chisels?
  • Do you know how to measure accurately for fittings?

If you’re confident in your abilities and have completed similar projects before, replacing the door yourself may be manageable. However, if you’re inexperienced with such tasks or unsure about any part of the process, hiring a professional might be a safer option.

Pros:

  • Cost Savings: By doing it yourself, you can save on labor costs.
  • Flexibility: You can work at your own pace and schedule.
  • Satisfaction: Completing the project yourself provides a sense of accomplishment.

Cons:

  • Time Intensive: Without experience, installation may take longer than expected.
  • Risk of Errors: Incorrect measurements or alignment issues could lead to drafts or poor functionality.
  • Equipment Costs: You may need to buy or rent specialized tools if you don’t already own them.

Expertise:

Professionals have extensive experience installing doors and can ensure precision in every step. This includes proper alignment of hinges, weatherproofing seals, and secure locking mechanisms.

Time Efficiency:

A skilled installer can complete the job quickly—often within hours—saving you time compared to tackling it on your own.

Warranty Protection:

Many professionals offer warranties for their work. This means any issues arising from the installation will likely be covered without additional costs.

Avoiding Hidden Challenges:

Door replacements often involve unforeseen complications such as uneven frames or structural damage around the opening. A professional will know how to handle these situations efficiently.

Key Factors To Consider Before Making Your Decision

Factor DIY Professional
Cost Lower upfront cost Higher due to labor fees
Tools May need to purchase/rent Included in service
Time Commitment Longer Shorter
Skill Requirements Moderate to high Not applicable

When Should You Opt for a Professional?

  1. The existing door frame is damaged or warped.
  2. You are installing custom-sized doors that require precise adjustments.
  3. You lack access to specialized tools needed for tasks like mortising hinges.
  4. There are additional features involved (e.g., sidelights, transoms).

Final Thoughts

Whether you decide to undertake this project independently or hire an expert depends largely on your confidence level and scope of work involved. While DIY replacement can save money upfront, any mistakes could lead to long-term issues that require costly repairs later on. For homeowners without prior experience or those dealing with complex installations, hiring a professional ensures peace of mind and quality results that last for years to come.

How Long Does It Take for a Door Company in Alexandria, VA to Replace Your Front Door?

Replacing a front door can be an efficient and straightforward process when planned correctly. Several factors, including the complexity of the installation, the type of door being installed, and your level of experience, can impact the time required for the project. Below, we’ll break down the timelines for each stage of a front door replacement project and provide tips to ensure you stay on track.

Factors That Impact Installation Time

  1. Pre-hung doors: These include both the door slab and frame, which makes installation quicker but heavier and more labor-intensive.
  2. Slab doors: Installing a slab door (without a frame) takes more time as it requires precise measurement and fitting into an existing frame.
  3. A well-maintained frame may reduce preparation time since it won’t need repairs or replacement.
  4. Damaged or rotted frames will require additional work to remove and replace before installing the new door.
  5. A professional carpenter or experienced DIYer can complete this task faster compared to someone with little experience.
  6. Painting or staining your new door may add several hours or days depending on drying times.
  7. Installing add-ons such as locks, weather stripping, or trim will increase total installation time.

Typical Time Breakdown for Replacing a Front Door

Task Estimated Time
Removing the old door 30 minutes – 1 hour
Preparing the existing framework 1 – 2 hours
Installing a pre-hung door 2 – 3 hours
Installing a slab door 4 – 6 hours
Caulking, weatherproofing, finishing 1 – 2 hours

On average, replacing a front door can take anywhere from 3 to 8 hours, depending on these variables. Professional installers often complete this process faster due to their expertise and specialized tools.

Steps That May Extend Project Duration

  • Door Customization: If your new front door needs trimming to fit an existing frame or if you’re adding decorative hardware such as sidelights or transoms.
  • Weather Delays: Outdoor conditions like rain can interrupt certain steps like caulking or painting.
  • Frame Repairs: If you discover rot or structural damage while removing your old frame.

Tips for Keeping Your Project On Schedule

  • Prepare all tools ahead of time (e.g., level, pry bar, drill).
  • Measure twice before cutting anything to avoid mistakes that need correction later.
  • Confirm that all components—door hardware, weather stripping—are ready prior to starting.
  • Consider painting or staining your new door before installation so it’s fully dry by completion day.

By planning carefully and following these guidelines, you can minimize delays and ensure that changing your front door is completed efficiently within one day.

closeup of locksmith hands using pick tools to open locked door closeup of locksmith hands using pick tools to open locked door door repair stock pictures, royalty-free photos & images

Can You Fit a New Front Door in an Existing Door Frame Without Hassle?

Replacing a front door can seem like a daunting task, but determining whether you can fit a new front door into an existing frame simplifies the process significantly. With proper measurements, the right tools, and careful attention to detail, this task can often be completed without major structural modifications. Below, we’ll explore the key considerations and steps to ensure a hassle-free installation.

Factors to Consider Before Starting

  • Condition of the Door Frame
    Ensure that your current door frame is in good condition. Look for signs of damage such as rotting wood, cracks, or warping. If you notice any structural issues, you may need to repair or replace the frame before proceeding.
  • Measurements
    Accurate measurements are critical. Measure not only the height and width of the existing frame but also ensure that it is square (aligned correctly). Use these steps:
  • Measure the height from floor to header (top of the frame).
  • Measure width at three points: top, middle, and bottom.
  • Confirm that both diagonal dimensions are equal to check for squareness.
  • Compatibility
    Match your new door to your current hardware and hinges. This ensures that adjustments during installation are minimal.

Step-by-Step Guide for Fitting a New Door into an Existing Frame

  1. Remove the Old Door
    Unscrew hinges and carefully take down your old door. Be careful not to damage the frame if you plan to reuse it.
  2. Clean out old caulk or debris from around the frame.
  3. Check weatherstripping for wear and tear; replace if necessary.
  4. Repair minor damages using wood filler or epoxy resin.
  5. Test-fit your new door by placing it within the existing frame.
  6. Make adjustments as needed by trimming edges slightly using a circular saw or planer.
  7. Install Hinges and Hardware
    Align hinges with pre-existing slots in your frame or carve out new hinge recesses using a chisel if required.
  8. Attach Weatherproofing Elements
    Apply weatherstripping around all edges of the door to enhance insulation and prevent drafts.
  9. Test and Adjust Alignment
    Open and close your new door multiple times to confirm proper alignment with no sticking points.

Benefits of Using an Existing Frame

Benefits Description
Cost Savings Eliminates expenses associated with purchasing and installing a brand-new frame
Time Efficiency Reduces overall installation time since no structural modifications are needed
Preservation of Aesthetic Retains original architectural style if older frames have unique design elements

Tips for Simplifying Installation

  • Use shims during installation for better alignment.
  • Sand uneven surfaces on either side of the existing frame carefully.
  • Opt for adjustable hinges if alignment proves challenging.

By understanding these considerations and following these steps precisely, you can successfully install a new front door into an existing frame while minimizing hassle or complications during execution.

How Much Does It Cost to Change the Front Door of Your Home?

Replacing your front door can significantly enhance both the aesthetic appeal and security of your home. However, one of the most common questions homeowners ask is: “How much will it cost?” The price to change your front door varies widely depending on factors such as materials, labor, and additional customizations. Below is a breakdown to help you understand the potential expenses involved.

Factors Influencing Front Door Replacement Costs

  1. Door Material
    The material you choose for your replacement door plays a significant role in determining its cost. Common types include:
  2. Wood: $500–$5,000 (durable with a premium look but requires maintenance).
  3. Steel: $300–$2,000 (affordable and energy-efficient but prone to dents).
  4. Fiberglass: $400–$4,000 (low maintenance and excellent insulation).
  5. Glass panel doors: $700–$5,000 (adds style but may require more security features).
  6. Door Style
    Intricate designs or custom styles tend to be more expensive:
  7. Pre-hung doors: Easier to install but typically cost more upfront.
  8. Slab doors: Economical option but may require additional work during installation.
  9. Labor Costs
    Professional installation fees will vary based on location, installer experience, and complexity:
  10. Average labor costs: $150–$500 per door.
  11. Additional Features
    Enhancements can increase costs:
  12. Upgraded locks or smart locks: $100–$400.
  13. Decorative trims or sidelights: $200–$1,500.
  14. Weatherproofing or insulation: $50–$200.

Cost Breakdown Table

Component Estimated Cost Range
Standard Door $300–$4,000
Labor $150–$500
Customization/Features $100–$2,000
Total Estimated Cost $550–$6,500+

DIY vs Professional Installation

While attempting a DIY installation could save money on labor costs (around $150-$500), it’s important to evaluate whether you have the skills and tools necessary for precise fitting. An improperly installed door could lead to drafts, water leaks, or compromised security—potentially incurring higher repair costs in the future.

  • Save on labor fees.
  • Gain hands-on experience.
  • Lacking specialized tools or expertise.
  • Potential damage to frames or uneven alignment.

Professional installation may have a higher upfront cost but ensures quality work and often includes warranties for peace of mind.

Tips to Save Money on Door Replacement

If you’re looking to manage costs effectively without compromising quality: – Shop around for deals or discounts from local retailers or manufacturers. – Consider purchasing pre-hung doors for easier installation. – Reuse your existing hardware when possible (e.g., knobs and locks). – Opt for energy-efficient models that can save money over time through reduced energy bills.

Replacing your front door is an investment in both functionality and curb appeal. By understanding what drives costs and planning accordingly, you can make informed decisions that fit both your budget and preferences while achieving long-lasting results.


Tips and Tricks for Smooth Door Installation Alexandria, VA Homeowners Can Rely On

A craftsman assembles sectional doors using a screwdriver. A craftsman assembles sectional doors using a screwdriver. The concept of sectional door installation. door repair stock pictures, royalty-free photos & images

Installing a door can seem like a straightforward process, but various challenges can arise that make the job more complex than expected. Whether you’re tackling this as a DIY project or working professionally, understanding how to identify and resolve door installation issues is essential. Below, we cover common problems and practical solutions to make your installation process smoother.

Avoid These Common Door Replacement Alexandria, VA Problems

  • Door Misalignment: When the door doesn’t sit squarely in the frame, leading to uneven gaps.
  • Binding or Sticking: The door rubs against the frame or floor, making it difficult to open or close smoothly.
  • Drafts and Air Leaks: Improper sealing around the edges allows air and moisture to pass through.
  • Loose or Noisy Hinges: Hardware that isn’t securely fastened may cause squeaking or instability.
  • Improper Fit in Frame: A door that is too large or too small for its opening can compromise function and aesthetics.

Troubleshooting Door Installation Challenges in Alexandria, VA

1. Check for Frame Issues

  • Use a level to ensure the frame is plumb, level, and square.
  • Look for warped materials in either the doorframe or surrounding structure.
  • If necessary, shim areas of the frame that are out of alignment.

2. Inspect for Binding and Sticking

  • Examine where the door binds against the frame:
    • Top binding: Sand down high points on the top edge of the door.
    • Side binding: Identify which side (hinge side or latch side) requires adjustment.
  • Tighten all screws in hinges as loose screws can cause misalignment.

3. Seal Drafts Effectively

  • Install weatherstripping along gaps where air infiltration occurs.
  • Use foam sealant for larger voids between the frame and wall.
  • Check thresholds for gaps beneath doors; adjust or replace as needed.

4. Address Hinges

  • Ensure hinges are properly aligned; use longer screws if needed for extra support.
  • If hinges are noisy, apply silicone-based lubricant instead of oil-based options, which may attract dust over time.

5. Resize Doors if Necessary

In some cases, resizing may be unavoidable: – For oversized doors: Trim edges incrementally using a circular saw with a fine-tooth blade. – For undersized doors: Consider adding an extension at one edge made from compatible wood material.

Quick Troubleshooting Reference Table for a Door Company in Alexandria, VA

Problem Possible Cause Solution
Binding/Sticking Misaligned hinges Realign hinges; tighten screws; plane binding areas
Drafts/Air Leaks Gaps between frame & wall Apply weatherstripping/sealant; adjust threshold height
Uneven Gaps Out-of-square frame Shim uneven areas; check plumb/level alignment
Loose Hinges Screws stripped/too short Replace with longer screws; reinforce hinge holes if damaged
Door Too Large Poor initial measurement Trim edges carefully with appropriate tools

Essential Preventative Tips for Door Repair Alexandria, VA

  1. Measure your space accurately before purchasing a new door or beginning modifications.
  2. Use quality tools such as levels, shims, and precision saw blades during installation.
  3. Select hardware designed for your specific type of door (e.g., heavy-duty hinges for solid-core doors).
  4. Test functionality throughout each phase of installation rather than waiting until completion.

By preparing adequately and following troubleshooting steps methodically when issues arise, you’ll ensure your finished product is both functional and visually appealing without unnecessary delays in your project timeline.

Understanding Door Binding and How to Address It During Installation

Door binding is a common issue encountered during or after door installation. It occurs when a door does not open or close smoothly, often due to misalignment or improper fitting. Addressing this problem during the installation process is essential to ensure that the door functions correctly and lasts for years to come.

What Causes Door Binding?

  • Improperly aligned hinges: Misaligned hinges can cause the door to tilt, creating pressure on certain areas of the frame.
  • Uneven frame: A warped or uneven door frame can lead to binding issues.
  • Incorrect measurements: If the door is too large for its frame, it may bind against the edges.
  • Environmental factors: Humidity and temperature changes can cause wood doors to swell or warp.

Identifying the root cause will help you determine an appropriate solution.

Tools You’ll Need

  • Screwdriver (manual or drill with bits)
  • Carpenter’s square
  • Level
  • Sandpaper or planer
  • Shims
  • Measuring tape

Having these tools on hand will make troubleshooting and adjustments faster and more precise.

How to Fix Door Binding During Installation

  1. Tighten all hinge screws securely.
  2. Use a carpenter’s square and level to ensure that hinges are aligned properly.
  3. If necessary, reposition hinges by unscrewing them slightly and adjusting their placement.
  4. Measure diagonally from corner to corner within the frame. The measurements should be equal on both sides.
  5. Use shims behind hinges if necessary to make minor adjustments.
  6. Close the door slowly while observing where it binds against the frame.
  7. Mark problem areas with a pencil for further attention.
  8. Use sandpaper or a planer to remove small amounts of material from tight spots on wooden doors.
  9. Be cautious not to over-plane; remove only what is necessary for smooth operation.
  10. After each adjustment, open and close the door repeatedly to ensure smooth operation before proceeding further.

Preventative Measures

  1. Ensure Proper Clearance
    Leave at least 1/8-inch clearance around all edges of the door. This gap allows for natural expansion due to humidity changes without causing binding.
  2. Seal Wooden Doors Properly
    Apply paint, varnish, or sealant evenly across all surfaces (including edges) of wooden doors before installation. This minimizes moisture absorption that could lead to warping over time.
  3. Use Quality Materials
    Invest in durable hinges and screws that can withstand regular use without loosening over time.
Common Issues Possible Solutions
Hinge misalignment Adjust hinge placement; tighten screws
Frame unevenness Add shims; recheck squareness
Swollen wood Plane affected areas; seal properly

By addressing these factors early in your project, you ensure trouble-free functionality while prolonging your door’s lifespan. Always take precise measurements and work carefully throughout every stage of installation for optimal results.

A Detailed Guide on How to Cut a Door to Fit Properly During Installation

Properly cutting a door during installation is a critical step to ensure it fits seamlessly within the frame. Missteps in this process can lead to gaps, improper alignment, or even damage to the door itself. Below is a detailed guide that provides you with clear instructions and expert tips for achieving a precise fit every time.

Tools and Materials Needed

  • Measuring tape – For accurate measurements of the door and frame.
  • Pencil or marker – To mark cutting guidelines on the door.
  • Straightedge or ruler – Ensures clean, straight cuts.
  • Circular saw or hand saw – For trimming excess material.
  • Clamps – To hold the door steady while cutting.
  • Sandpaper (medium-grit) – To smooth rough edges after cutting.
  • Drop cloth or tarp – Protects your workspace from debris.

Step-by-Step Instructions

  1. Begin by measuring the height and width of the door frame opening. Ensure that you account for any irregularities in the frame’s dimensions.
  2. Compare these measurements with those of your door. If your door is too large, proceed to adjust its size.
  3. Using a pencil and straightedge, mark clear guidelines where cuts are needed.
  4. Double-check measurements before proceeding; remember, it’s better to cut too little than too much.
  5. Lay the door flat on a stable work surface, such as sawhorses or a workbench.
  6. Use clamps to keep it securely in place during cutting.
  7. Position your circular saw along the marked line and cut slowly for accuracy.
  8. If using a hand saw, ensure smooth, consistent strokes to avoid uneven edges.
  9. After cutting, sand down any rough areas using medium-grit sandpaper.
  10. Focus on creating clean edges that fit snugly into your frame without snagging or binding.
  11. Place the trimmed door into its intended position within the frame.
  12. Check for gaps around all sides and make additional adjustments if required.

Common Mistakes to Avoid

  1. Cutting too much material at once: Always aim for gradual adjustments rather than making aggressive cuts that could ruin your project entirely.
  2. Failing to account for clearance: Leave enough space (about 1/8 inch) at both sides of the frame for hinges and operation clearance.
  3. Ignoring sanding: Skipping this step may cause splinters that affect aesthetics or functionality over time.

Recommended Clearance Measurements

Area Ideal Clearance Notes
Top of Door 1/8 inch Prevents binding when opening/closing
Bottom of Door ½ inch (or more) Allows air circulation; varies by flooring type
Sides of Door 1/8 inch per side Ensures smooth hinge movement

Cutting doors properly during installation requires patience and precision but saves time and frustration later on by ensuring an optimal fit from day one.

man repairing the doorknob. closeup of worker's hands installing new door locker worker's hands installing new door locker man repairing the doorknob. closeup door repair stock pictures, royalty-free photos & images

A Detailed Guide on How to Cut a Door to Fit Properly During Installation

Cutting a door to fit properly during installation is an essential skill for ensuring a seamless fit within the frame. Whether you’re working with a new door or modifying an existing one, precision is crucial to avoid gaps, misalignment, or damage. Below is a step-by-step guide to help you achieve professional results.

Tools and Materials You’ll Need

  • Measuring tape
  • Pencil or marking tool
  • Circular saw or hand saw
  • Clamps
  • Straightedge or guide rail
  • Sandpaper (medium and fine grit)
  • Safety equipment (goggles and mask)
  • Wood sealer or paint (optional, for edge finishing)

1. Measure the Door Frame Opening

To ensure accuracy, begin by measuring the door frame opening where the door will be installed. Measure both width and height at multiple points (top, middle, and bottom) since frames can sometimes be uneven.

Pro Tip: Always deduct approximately 1/8 inch from your measurements on all sides to allow for smooth operation of the door without binding.

2. Mark the Door for Cutting

Using your measurements, mark where material needs to be removed from the door. Use a pencil and straightedge to draw clear cutting lines across the surface of the door. Ensure these lines are level with respect to both sides.

Note: If cutting both width and height is required, prioritize symmetry by removing equal amounts from opposing sides whenever possible.

3. Secure the Door for Cutting

Lay the door on a stable surface such as sawhorses or a workbench. Use clamps to secure it firmly in place so it doesn’t move while cutting.

Choosing The Right Saw For The Job

Type of Saw Best For Considerations
Circular Saw Straight precise cuts Requires proper alignment of guide rail
Hand Saw Small adjustments Slower but offers more control

Select a tool based on how much material you need to remove.

4. Make Clean Cuts

Position your saw blade slightly outside your marked line (on waste wood side) for accuracy. Use slow, deliberate movements when cutting along the line.

For long cuts: – Attach a straightedge as a guide. – Double-check alignment before beginning.

5. Sand Edges Smooth

After cutting, use medium-grit sandpaper followed by fine-grit sandpaper to smooth out any rough edges along your cut line.

Finishing Touches

  1. Test Fit the Door: Place it in its frame before proceeding with painting or sealing.
  2. Seal Cut Edges: To prevent moisture damage over time, apply primer or wood sealer along freshly cut edges.
  3. Repaint if Necessary: Match paint color/stain with existing finishes after sealing edges.

By following these steps carefully, you can ensure that your door fits perfectly into its frame while maintaining structural integrity and aesthetic appeal during installation efforts.

How to Plane a Binding Door for Perfect Alignment After Installation

When a door binds, it can be frustrating and inconvenient. Binding occurs when the door sticks or rubs against the frame, making it difficult to open or close smoothly. This issue typically arises due to improper alignment during installation, environmental factors (like humidity), or the natural settling of a house over time. Planing the door is an effective way to resolve this problem and achieve perfect alignment. Below is a detailed guide on how to plane a binding door while ensuring precision and avoiding damage.

Tools You Will Need

Before starting, gather the following tools and materials:
– A hand plane or power planer
– Screwdriver (to remove hardware)
– Sandpaper (medium grit)
– Measuring tape
– Pencil or marker for marking areas to be planed
– Clamps (optional)
– Safety glasses

Identifying Problem Areas

  1. Examine the Door: Open and close the door slowly to determine where it binds. Look for spots where it rubs against the frame or floor.
  2. Mark Trouble Spots: Once identified, use a pencil or marker to mark these areas clearly on the edge of the door.

Removing the Door

To make planing easier, it’s often best to remove the door from its hinges:
1. Use a screwdriver to carefully remove hinge pins starting from the bottom hinge, working your way up. 2. Lay the door flat on sawhorses or another stable surface for support.

Planing Process

  1. Start Small: Begin by using a hand plane on marked areas. Remove thin layers of wood slowly and evenly; avoid removing too much material in one go as this can compromise structural integrity.
  2. Check Continuously: After every few passes with your planer, rehang the door temporarily to check if it fits correctly within its frame.
  3. Address Uneven Surfaces: If you notice high spots along edges after planing, smooth them out with sandpaper for an even finish.
  4. Focus on Hinges if Necessary: Sometimes binding results from improperly aligned hinges rather than excess wood; ensure all hinges are flush with both frame and door.
Common Mistakes To Avoid Suggested Solutions
Removing too much wood Plane slowly; test fit frequently
Ignoring warped frames Check if binding originates in frame itself
Not sanding edges Always smooth planed areas post-adjustment

Reinstalling The Door

Once satisfied with your adjustments:
1. Reattach hinges securely, ensuring screws are tightened evenly for proper alignment. 2. Test your work by opening/closing multiple times under normal conditions.

Pro Tips for Achieving Optimal Results

  • Always wear safety gear like glasses when working with tools.
  • Work in well-lit environments to identify subtle flaws easily.
  • Avoid planing painted doors without checking lead paint safety guidelines first.

Expert Tips on Extending a Door to Fit Larger Frames

When installing a door into a larger frame, you may encounter challenges if the door is too small for the opening. Extending a door to fit properly not only improves its appearance but also ensures it functions correctly, providing security and insulation. Below are expert tips and methods for effectively extending your door to fit larger frames.

Assessing the Size Gap

  • Width: Measure across the top, middle, and bottom of the frame.
  • Height: Take measurements from both sides of the frame.
  • Allowances: Consider leaving a clearance gap (typically 1/8 inch on each side) for smooth operation once installed.

Keep in mind that accuracy is essential to avoid future issues such as binding or improper alignment.

Materials Needed for Door Extensions

  • Wooden strips or edge banding (same wood type as your existing door, if possible)
  • Wood glue or construction adhesive
  • Clamps
  • Screws (if additional reinforcement is necessary)
  • Sandpaper (medium and fine grit)
  • Paint or stain (to match the existing finish)
  • Measuring tape and pencil
  • Circular saw or hand saw (to trim extensions if required)

Having all these tools ready before you start will streamline your workflow and ensure better results.

Step-by-Step Process for Extending Your Door

  1. Cut wooden strips that match both the thickness of your door and extend slightly beyond what is required in length.
  2. Apply wood glue evenly along one edge of the strip.
  3. Firmly press it onto the corresponding side of your door where material needs to be added.
  4. Secure with clamps while allowing adequate drying time based on glue manufacturer instructions.
  5. For additional sturdiness, add screws along with glued sections. Be sure they’re countersunk into the wood so they don’t protrude above its surface.
  6. Once secured, use a circular saw or hand saw to carefully trim any overhanging portions so that extensions align seamlessly with the original edges.
  7. Smooth out any rough edges or uneven joints by sanding with medium-grit paper first, followed by fine-grit sandpaper for a polished finish.
  8. Paint or stain extended areas so they match perfectly with your existing door.
  9. Allow sufficient drying time before proceeding with installation into its frame.

Additional Tips for Professional Results

  • Ensure that wood strips are cut precisely at right angles using proper measuring tools.
  • Avoid over-sanding as this could create irregularities in thickness.
  • Always work in a dust-free environment when applying finishes like paint or varnish to maintain consistency.

If done correctly, these steps will allow you to effectively extend your door without compromising its structural integrity or aesthetic appeal.

Potential Issue Solution
Gaps after installation Recheck measurements; add weatherstripping
Finish mismatch Test paint/stain on scrap wood first
Weak bonding Use stronger adhesives or add screws

Taking these precautions will help ensure your extended door fits perfectly within its new frame while maintaining functionality and style.