Replacing your front door can transform the appearance, security, and energy efficiency of your home. Whether you are upgrading for aesthetic reasons or improving functionality, understanding the process is essential. This guide provides a comprehensive overview of replacing your front door.
Benefits of Replacing Your Front Door
- Improved Curb Appeal: A new door enhances the overall look of your home, making it more inviting.
- Better Security: Modern doors often come with improved locking mechanisms and durable materials for added security.
- Energy Efficiency: Many new doors feature better insulation and weatherstripping, reducing drafts and lowering energy bills.
- Increased Home Value: Upgrading your front door can boost property value due to its functional and aesthetic benefits.
Preparing for Door Replacement
- Measure the height, width, and depth of your current door to ensure an accurate fit for the replacement.
- Note whether you have a standard-sized or custom-sized frame.
- Select a material that aligns with your needs (wood, fiberglass, steel). Each material has unique benefits in terms of durability, style, and maintenance.
- Decide on design features like windows, paneling styles, or finishes.
- Check Building Codes and HOA Rules (if applicable)
- Verify that the new door meets local codes or homeowner association regulations.
- Gather Necessary Tools and Supplies (see tool list below).
Essential Tools for Replacing Your Front Door
| Tool/Material | Purpose |
| Measuring tape | For accurate dimensions |
| Pry bar | To remove old trim or framing |
| Screwdriver/Drill | For removing screws from hinges |
| Hammer | To adjust nails during removal |
| Utility knife | To cut caulking or paint around old trim |
| Weatherstripping | For sealing gaps after installation |
| Level | To ensure proper alignment |
Optional but useful items include foam insulation spray (to fill gaps) and a saw (if trimming is required).
Step-by-Step Process to Replace Your Front Door
- Begin by unscrewing hinges with a drill or screwdriver.
- Use a pry bar to carefully remove any surrounding trim or molding.
- Check the existing frame for signs of damage such as rot or cracks.
- If damaged, repair or replace the frame before proceeding with installation.
- Clean out debris from the frame area.
- Ensure that all surfaces are level for proper alignment during installation.
- Place the new door in its opening to confirm fitment.
- Make minor adjustments if necessary using shims or trimming tools.
- Align hinges with pre-drilled holes on both the frame and door.
- Secure them tightly using screws while confirming smooth movement when opening/closing.
- Apply weatherstripping around edges for better insulation.
- Use caulk along seams where air might leak through.
- Add back decorative trim pieces around your doorway for a polished finish.
- Test Functionality Verify that locks work smoothly and inspect gaps around edges after installation is complete.
Tips for Success During Installation
- Always double-check measurements before making permanent modifications like cutting or drilling holes in frames.
- Work slowly during alignment steps since small changes can significantly impact how well your new front door operates over time.
- Enlist help if needed—the weight of certain doors can make solo handling challenging without assistance.
Replacing your front door may seem daunting at first but following these clear steps ensures a successful transformation tailored specifically toward improving appearance while maintaining long-term durability throughout years ahead!
A Step-by-Step Guide to Replacing Your Front Door for a Professional Finish
Replacing your front door can significantly enhance the curb appeal, security, and energy efficiency of your home. While the process may seem daunting at first, following a systematic approach ensures a professional-quality result. Below is a detailed guide to walk you through the steps of replacing your front door.
Step 1: Measure Your Existing Door and Frame
- Door Dimensions: Measure the height and width of your current door. Ensure you measure across the widest and tallest points in case of inconsistencies.
- Frame Depth: Check how deep the frame is to ensure compatibility with the new door.
- Rough Opening: Remove any trim around the door to measure the rough opening size (the opening in the wall behind the frame).
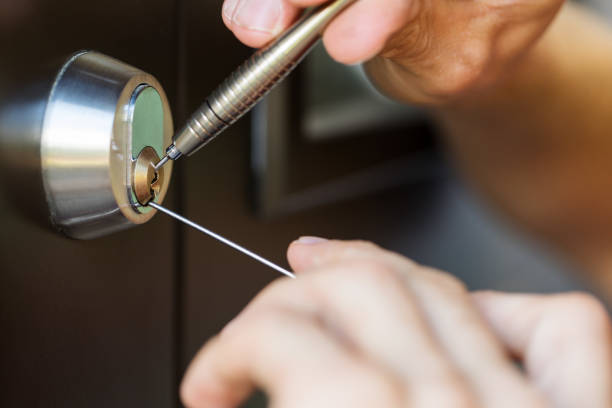
- Hinge and Lock Placements: Mark where hinges and locks are located on your current door as this may influence your choice.
Pro Tip: Double-check all measurements before purchasing your new door to avoid costly mistakes.
Step 2: Gather Essential Tools and Materials
- Screwdriver set (flathead and Phillips)
- Pry bar or crowbar
- Hammer or mallet
- Utility knife
- Measuring tape
- Level tool (24” or longer)
- Power drill with bits for screws and pilot holes
- Insulation material (foam or weatherstripping)
Additionally, depending on whether you’re keeping or replacing the frame, you may need shims, finishing nails, caulk, wood filler, paintbrushes, or touch-up paint.
Step 3: Remove the Old Door and Frame Components
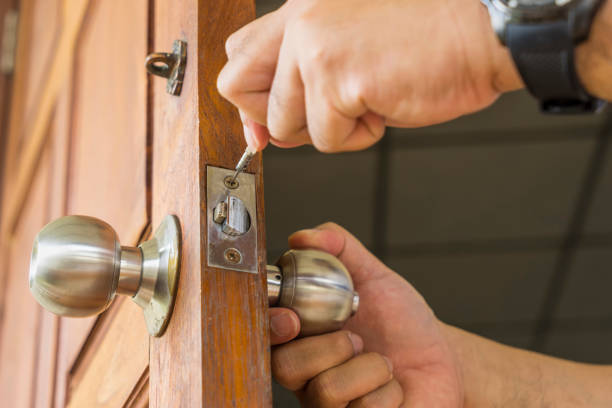
- Unscrew hinges from both sides using a screwdriver.
- If applicable, remove existing hardware such as knobs, locks, deadbolts, or peepholes.
- Use a pry bar to loosen trim pieces without damaging surrounding walls.
- If replacing the entire frame, use caution when removing it so you don’t harm adjacent structures.
If you’re keeping the original frame intact but upgrading only the door slab itself—clean all edges thoroughly before proceeding.
Step 4: Fit and Adjust Your New Door
- Place new doors into their designated openings temporarily (“dry-fitting process”). Check alignment using levels. 2 . Make certain there’s space evenly distributed beneath thresholds while ensuring side gaps remain consistent along lengthwise borders.
Breaking Down the Door Installation Alexandria, VA Process: Are Front Doors Hard to Install?
Installing a front door can seem like a challenging task, especially for those unfamiliar with home improvement projects. However, by breaking the process into manageable steps and understanding the key considerations, it is possible to demystify the task. Whether you are a DIY enthusiast or simply curious about what door installation entails, this guide will offer you clarity.
Factors That Influence Installation Difficulty
- Pre-hung doors (which include the frame): Easier to install because they come as a single unit.
- Slab doors (just the door itself): Require more precision and adjustments, as you must fit them into an existing frame.
- A structurally sound frame makes installation straightforward.
- If there’s damage such as rot or warping, replacing or repairing the frame adds complexity.
- Having the right tools makes tasks like leveling, measuring, and fastening more manageable.
- First-time installers may face a steeper learning curve compared to experienced professionals.
- Custom-sized doors may require trimming or resizing, which can complicate installation.
- Additional features like sidelights or transoms also increase difficulty.
Step-by-Step Breakdown of Door Installation
- Remove the existing door by unscrewing hinges and carefully lifting it out.
- Inspect the old frame for damage such as rot or wear; repair if necessary.
- Measure accurately to ensure your new door fits properly in terms of height, width, and depth.
- Place the pre-hung unit into position within the rough opening.
- Use shims along both sides to center and level it evenly.
- Secure it with screws through the provided holes in the jambs.
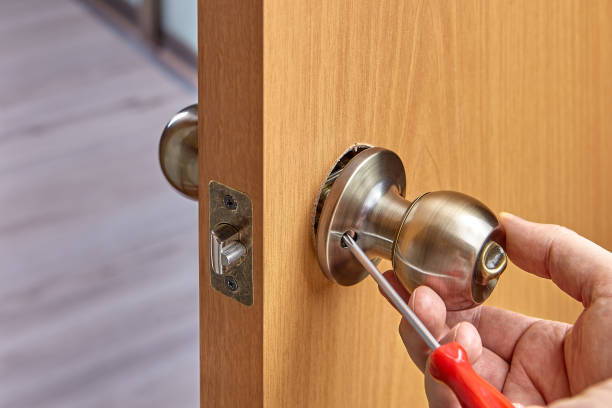
- Align hinges on both the new slab door and existing frame before attaching them securely.
- Test hinge alignment by swinging open/closed—adjustments may be needed for smooth functionality.
- Apply weatherstripping around edges to improve insulation and energy efficiency.
- Add caulking around exterior trim for weatherproofing purposes.
- Install hardware such as locks or handles to finish up.
Tools Often Required for Door Installation
| Tool | Purpose |
| Measuring tape | Ensures dimensions are accurate |
| Level | Verifies correct alignment |
| Screwdriver/Drill | Secures screws swiftly |
| Pry bar | Assists in removing old components |
| Saw (if needed) | Trims excess material from frames/doors |
| Caulk gun | Applies sealant neatly around trim |
| Shims | Helps create balance during adjustment |
Common Challenges During Door Installation
- Misaligned Hinges: Can cause difficulty opening/closing; adjustments are typically required post-installation.
- Improper Sealing: Without sufficient caulking or weatherstripping, drafts can occur around edges.
- Measurement Errors: Small inaccuracies result in doors that don’t fit properly within their frames.
For beginners tackling their first project alone, patience is key when overcoming these challenges.
Professional vs DIY Considerations
- If structural repairs (e.g., replacing rotten frames) are required
- When dealing with large custom doors that need precise fitting techniques
- For homeowners short on time who prefer expert-level results
By understanding your skill set and assessing each project individually based on these criteria above—whether simple or complex—it becomes easier to determine if tackling this task yourself is feasible or better left in professional hands
Understanding Door Replacement in Alexandria, VA: Is Installing Front Doors Difficult?
Installing a front door can seem like a daunting project, especially for homeowners attempting it for the first time. However, with proper preparation, understanding of the process, and the right tools, it’s a task that many can accomplish. Below is a comprehensive breakdown of what makes front door installation challenging and how to approach it step by step.
Factors That Impact Door Installation Difficulty
- Door Type and Material
Heavier doors made from materials like solid wood or steel may require additional effort compared to lightweight fiberglass or composite doors. - Door Frame Condition
If the existing frame is damaged, warped, or out of alignment, you may need additional repairs before installing the new door. - Measurement Accuracy
A poorly measured frame can lead to improper fitting of the door, which could cause air drafts or security vulnerabilities. - Required Adjustments
Older homes often have non-standard door frames that require more cutting and customization for proper fitting.
Breaking Down the Installation Process
- Preparation
Before beginning any installation work: - Remove any old hinges and hardware from the existing frame.
- Measure the width, height, and depth of your entryway to ensure your new door fits perfectly.
- Gather all necessary tools (see “Essential Tools” below).
- Removing the Old Door
Carefully unhinge and remove your old front door. Check for damage in areas like: - The threshold
- The jambs
- Surrounding trim and weatherstripping
- Inspecting & Preparing the Frame
If there are signs of rot or misalignment in your frame: - Address these issues before proceeding with installation.
- Use shims where necessary to ensure everything is level.
- Installing the New Door
Steps include: - Positioning your new door in place.
- Securing it temporarily while making adjustments.
- Attaching hinges properly and ensuring smooth operation during opening/closing.
- Adding Finishing Touches
Finish by installing weatherstripping, seals, handles/knobs, locks, and any other hardware included with your new door.
Challenges You Might Encounter
- Misaligned hinges causing difficulty in hanging or leveling.
- Damage when removing an old frame (especially if it’s been painted over multiple times).
- Difficulty securing screws into uneven surfaces like aged wood or brick structures.
Addressing these issues requires patience as well as knowledge about structural repairs beyond basic carpentry skills.
Should You Seek Professional Help?
- If you lack confidence in using saws/drills safely—or working around heavy materials—it’s wise instead hire professionals who specialize specifically here ensuring secure longevity+ safety overall .
Should You Replace Doors Alexandria, VA Yourself or Hire a Professional?
Replacing your front door can significantly enhance the aesthetic and security of your home. However, deciding whether to tackle the project yourself or hire a professional depends on various factors such as your skill level, the complexity of the job, and your budget. Here’s an in-depth look at what you should consider before making a decision.
Assessing Your Skill Level
- Do you have prior experience with DIY projects?
- Are you comfortable using tools like drills, saws, levels, and chisels?
- Do you know how to measure accurately for fittings?
If you’re confident in your abilities and have completed similar projects before, replacing the door yourself may be manageable. However, if you’re inexperienced with such tasks or unsure about any part of the process, hiring a professional might be a safer option.
Pros:
- Cost Savings: By doing it yourself, you can save on labor costs.
- Flexibility: You can work at your own pace and schedule.
- Satisfaction: Completing the project yourself provides a sense of accomplishment.
Cons:
- Time Intensive: Without experience, installation may take longer than expected.
- Risk of Errors: Incorrect measurements or alignment issues could lead to drafts or poor functionality.
- Equipment Costs: You may need to buy or rent specialized tools if you don’t already own them.
Expertise:
Professionals have extensive experience installing doors and can ensure precision in every step. This includes proper alignment of hinges, weatherproofing seals, and secure locking mechanisms.
Time Efficiency:
A skilled installer can complete the job quickly—often within hours—saving you time compared to tackling it on your own.
Warranty Protection:
Many professionals offer warranties for their work. This means any issues arising from the installation will likely be covered without additional costs.
Avoiding Hidden Challenges:
Door replacements often involve unforeseen complications such as uneven frames or structural damage around the opening. A professional will know how to handle these situations efficiently.
Key Factors To Consider Before Making Your Decision
| Factor | DIY | Professional |
| Cost | Lower upfront cost | Higher due to labor fees |
| Tools | May need to purchase/rent | Included in service |
| Time Commitment | Longer | Shorter |
| Skill Requirements | Moderate to high | Not applicable |
When Should You Opt for a Professional?
- The existing door frame is damaged or warped.
- You are installing custom-sized doors that require precise adjustments.
- You lack access to specialized tools needed for tasks like mortising hinges.
- There are additional features involved (e.g., sidelights, transoms).
Final Thoughts
Whether you decide to undertake this project independently or hire an expert depends largely on your confidence level and scope of work involved. While DIY replacement can save money upfront, any mistakes could lead to long-term issues that require costly repairs later on. For homeowners without prior experience or those dealing with complex installations, hiring a professional ensures peace of mind and quality results that last for years to come.
How Long Does It Take for a Door Company in Alexandria, VA to Replace Your Front Door?
Replacing a front door can be an efficient and straightforward process when planned correctly. Several factors, including the complexity of the installation, the type of door being installed, and your level of experience, can impact the time required for the project. Below, we’ll break down the timelines for each stage of a front door replacement project and provide tips to ensure you stay on track.
Factors That Impact Installation Time
- Pre-hung doors: These include both the door slab and frame, which makes installation quicker but heavier and more labor-intensive.
- Slab doors: Installing a slab door (without a frame) takes more time as it requires precise measurement and fitting into an existing frame.
- A well-maintained frame may reduce preparation time since it won’t need repairs or replacement.
- Damaged or rotted frames will require additional work to remove and replace before installing the new door.
- A professional carpenter or experienced DIYer can complete this task faster compared to someone with little experience.
- Painting or staining your new door may add several hours or days depending on drying times.
- Installing add-ons such as locks, weather stripping, or trim will increase total installation time.
Typical Time Breakdown for Replacing a Front Door
| Task | Estimated Time |
| Removing the old door | 30 minutes – 1 hour |
| Preparing the existing framework | 1 – 2 hours |
| Installing a pre-hung door | 2 – 3 hours |
| Installing a slab door | 4 – 6 hours |
| Caulking, weatherproofing, finishing | 1 – 2 hours |
On average, replacing a front door can take anywhere from 3 to 8 hours, depending on these variables. Professional installers often complete this process faster due to their expertise and specialized tools.
Steps That May Extend Project Duration
- Door Customization: If your new front door needs trimming to fit an existing frame or if you’re adding decorative hardware such as sidelights or transoms.
- Weather Delays: Outdoor conditions like rain can interrupt certain steps like caulking or painting.
- Frame Repairs: If you discover rot or structural damage while removing your old frame.
Tips for Keeping Your Project On Schedule
- Prepare all tools ahead of time (e.g., level, pry bar, drill).
- Measure twice before cutting anything to avoid mistakes that need correction later.
- Confirm that all components—door hardware, weather stripping—are ready prior to starting.
- Consider painting or staining your new door before installation so it’s fully dry by completion day.
By planning carefully and following these guidelines, you can minimize delays and ensure that changing your front door is completed efficiently within one day.
Can You Fit a New Front Door in an Existing Door Frame Without Hassle?
Replacing a front door can seem like a daunting task, but determining whether you can fit a new front door into an existing frame simplifies the process significantly. With proper measurements, the right tools, and careful attention to detail, this task can often be completed without major structural modifications. Below, we’ll explore the key considerations and steps to ensure a hassle-free installation.
Factors to Consider Before Starting
- Condition of the Door Frame
Ensure that your current door frame is in good condition. Look for signs of damage such as rotting wood, cracks, or warping. If you notice any structural issues, you may need to repair or replace the frame before proceeding. - Measurements
Accurate measurements are critical. Measure not only the height and width of the existing frame but also ensure that it is square (aligned correctly). Use these steps: - Measure the height from floor to header (top of the frame).
- Measure width at three points: top, middle, and bottom.
- Confirm that both diagonal dimensions are equal to check for squareness.
- Compatibility
Match your new door to your current hardware and hinges. This ensures that adjustments during installation are minimal.
Step-by-Step Guide for Fitting a New Door into an Existing Frame
- Remove the Old Door
Unscrew hinges and carefully take down your old door. Be careful not to damage the frame if you plan to reuse it. - Clean out old caulk or debris from around the frame.
- Check weatherstripping for wear and tear; replace if necessary.
- Repair minor damages using wood filler or epoxy resin.
- Test-fit your new door by placing it within the existing frame.
- Make adjustments as needed by trimming edges slightly using a circular saw or planer.
- Install Hinges and Hardware
Align hinges with pre-existing slots in your frame or carve out new hinge recesses using a chisel if required. - Attach Weatherproofing Elements
Apply weatherstripping around all edges of the door to enhance insulation and prevent drafts. - Test and Adjust Alignment
Open and close your new door multiple times to confirm proper alignment with no sticking points.
Benefits of Using an Existing Frame
| Benefits | Description |
| Cost Savings | Eliminates expenses associated with purchasing and installing a brand-new frame |
| Time Efficiency | Reduces overall installation time since no structural modifications are needed |
| Preservation of Aesthetic | Retains original architectural style if older frames have unique design elements |
Tips for Simplifying Installation
- Use shims during installation for better alignment.
- Sand uneven surfaces on either side of the existing frame carefully.
- Opt for adjustable hinges if alignment proves challenging.
By understanding these considerations and following these steps precisely, you can successfully install a new front door into an existing frame while minimizing hassle or complications during execution.
How Much Does It Cost to Change the Front Door of Your Home?
Replacing your front door can significantly enhance both the aesthetic appeal and security of your home. However, one of the most common questions homeowners ask is: “How much will it cost?” The price to change your front door varies widely depending on factors such as materials, labor, and additional customizations. Below is a breakdown to help you understand the potential expenses involved.
Factors Influencing Front Door Replacement Costs
- Door Material
The material you choose for your replacement door plays a significant role in determining its cost. Common types include: - Wood: $500–$5,000 (durable with a premium look but requires maintenance).
- Steel: $300–$2,000 (affordable and energy-efficient but prone to dents).
- Fiberglass: $400–$4,000 (low maintenance and excellent insulation).
- Glass panel doors: $700–$5,000 (adds style but may require more security features).
- Door Style
Intricate designs or custom styles tend to be more expensive: - Pre-hung doors: Easier to install but typically cost more upfront.
- Slab doors: Economical option but may require additional work during installation.
- Labor Costs
Professional installation fees will vary based on location, installer experience, and complexity: - Average labor costs: $150–$500 per door.
- Additional Features
Enhancements can increase costs: - Upgraded locks or smart locks: $100–$400.
- Decorative trims or sidelights: $200–$1,500.
- Weatherproofing or insulation: $50–$200.
Cost Breakdown Table
| Component | Estimated Cost Range |
| Standard Door | $300–$4,000 |
| Labor | $150–$500 |
| Customization/Features | $100–$2,000 |
| Total Estimated Cost | $550–$6,500+ |
DIY vs Professional Installation
While attempting a DIY installation could save money on labor costs (around $150-$500), it’s important to evaluate whether you have the skills and tools necessary for precise fitting. An improperly installed door could lead to drafts, water leaks, or compromised security—potentially incurring higher repair costs in the future.
- Save on labor fees.
- Gain hands-on experience.
- Lacking specialized tools or expertise.
- Potential damage to frames or uneven alignment.
Professional installation may have a higher upfront cost but ensures quality work and often includes warranties for peace of mind.
Tips to Save Money on Door Replacement
If you’re looking to manage costs effectively without compromising quality: – Shop around for deals or discounts from local retailers or manufacturers. – Consider purchasing pre-hung doors for easier installation. – Reuse your existing hardware when possible (e.g., knobs and locks). – Opt for energy-efficient models that can save money over time through reduced energy bills.
Replacing your front door is an investment in both functionality and curb appeal. By understanding what drives costs and planning accordingly, you can make informed decisions that fit both your budget and preferences while achieving long-lasting results.
- Comprehensive Guide to Replacing Doors in Alexandria, VA: Everything You Need to Know
- Essential Guide to Replacing Screen Doors in Alexandria, VA: Tips for a Perfect Fit
- Ultimate Guide to Doors Alexandria, VA: Enhancing Aesthetic and Security
- Essential Tips from a Door Company in Alexandria, VA for Replacing Your Entry Door
- Comprehensive Guide to Door Repair Alexandria, VA: How to Replace Your Front Door
- Tips and Tricks for Smooth Door Installation Alexandria, VA Homeowners Can Rely On
- Door Replacement Alexandria, VA: Your Ultimate Guide to a Seamless Upgrade
- Your Complete Guide to Installing Doors in Alexandria, VA